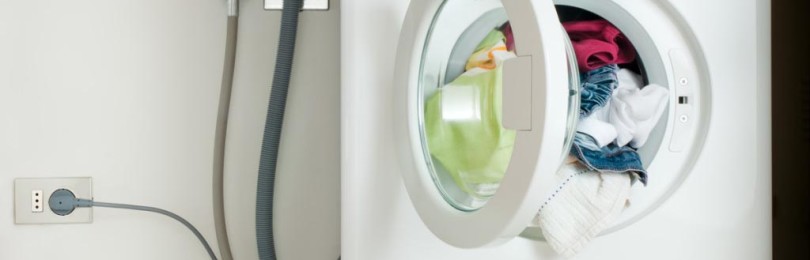
A washing machine has long become an essential household appliance in every modern home. It not only makes daily monotonous work easier, but also has washing capabilities that are completely beyond the power of human hands. In order for the device to work correctly and without breakdowns, it is necessary to responsibly approach the issue of installing the washing machine and its connection. Competent actions at this important stage will avoid many breakdowns in the future and maintain the service warranty.
Choosing a location to install the washing unit
Determining the location is primarily influenced by the area of the premises and the convenient location of all communications.Most often, washing machines are installed in the bathroom or kitchen. The latter option usually has more space and less dampness, which can have a detrimental effect on the details. But it is important to place the device away from heat sources to avoid the negative influence of temperature.
Some craftsmen manage to place a washing machine in the hallway or closet above the toilet. The latter option requires certain skills and impeccably reliable fixation.
In private homes, washing machines are sometimes installed in dry, heated basements. Since the sewage system is somewhat higher, it is necessary to connect pumping equipment to the drainage system.
Undoubtedly, the best place for a washing machine will be a separate laundry room. Here you can install a dryer, ironing board, place laundry baskets and shelves with detergents. Working appliances in a separate room will not disturb the residents of the house at all.
Correct installation of the machine requires following a few simple recommendations:
- It is imperative to provide a convenient and open approach to the device.
- It is recommended to install near sewerage and water supply points. Too long lines make it difficult for the pump to operate and can cause water to stagnate in the hoses and cause an unpleasant odor.
- The floor must be hard and perfectly level. If there is no such thing in the selected area, the device must be installed. Do not install the machine on soft carpeted surfaces.
- It is unacceptable to place the washing machine in damp, unheated rooms, as this will lead to the development of mold and mildew, and the remaining water in the hoses may freeze and rupture them.All exact environmental requirements are specified in the product technical data sheet.
- The machine should not touch other pieces of furniture, walls or plumbing.
An important point remains the aesthetic side of the issue. They try to select new equipment according to the style and color of the interior. The installation is carried out so that it does not disturb the overall design of the room, or the machine is simply hidden behind decorative panels.
Unpacking and checking the integrity of the washing machine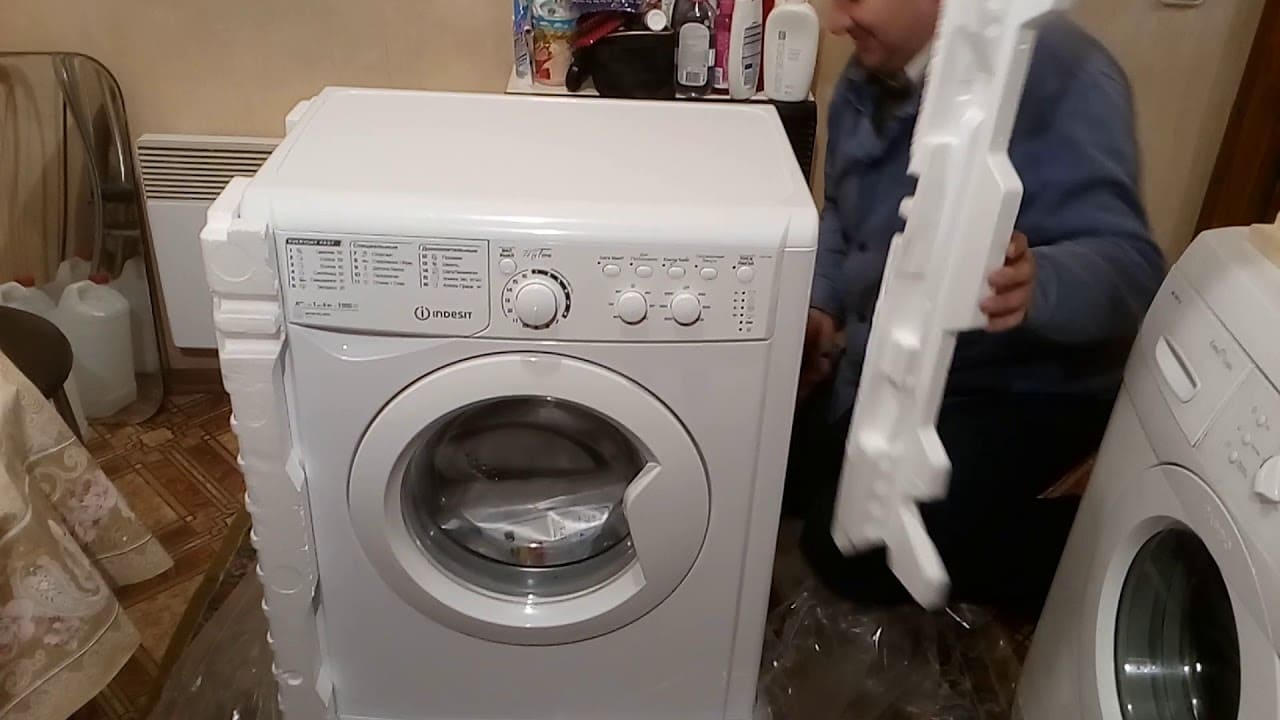
To begin with, the new washing machine must be freed from the original packaging, polymer tapes and foam inserts. If questions arise during the warranty period, the box will still be useful, so you shouldn’t throw it away.
For safety during transportation, the device is equipped with various fasteners. They protect the internal parts of the machine from accidental damage while in motion. All of them must be removed before starting work. The number and location of fasteners may vary depending on the characteristics of a particular model, but, in general, these should be approximately the following places:
- Rear wall of the case - staples secure hoses and electrical cord.
- Sealing bars are placed between the machine body and the tank. To remove them, open the lid and slightly tilt the device forward.
- Sometimes separate sealing elements are located inside the drum and on its lid, in trays for detergents.
The drum itself usually contains components: flexible hoses, brackets, plugs and other small items.
At the unpacking stage, the machine, hoses and wires should be carefully inspected for damage.The presence of chips, cracks and other defects is a direct signal for the return of defective equipment. Its further exploitation is extremely dangerous.
What tools will you need when installing washing equipment?
Machine installation services can be ordered from professionals, but their cost is usually very high. If you prepare well, carefully study all aspects of the issue and arm yourself with the necessary tools, you can do the work yourself and save a lot of money at the same time.
To install the washing machine you will need:
- gas key;
- wrench;
- adjustable wrench;
- set for soldering pipes: cutter and soldering iron (used when inserting hoses into PVC pipes);
- flexible hose for connection to the pipeline;
- withdrawal (if necessary);
- adapter with thread;
- fittings, unions, crimp coupling and tee;
- sealants: FUM tape, flax or other type of tow.
The variety of tools may vary depending on the connection location, the factory configuration of the machine and placement features. Therefore, before going to the store, you need to carefully consider all the nuances of your future work. The factory instructions will help in this matter, which should be carefully studied at this stage. It will allow you to become familiar with the features of a particular model and its technical characteristics. Recommendations from the manufacturer contain valuable information that will help avoid many breakdowns and problems in the future. Failure to comply with them may result in denial of warranty repairs.
Removing the transport bolts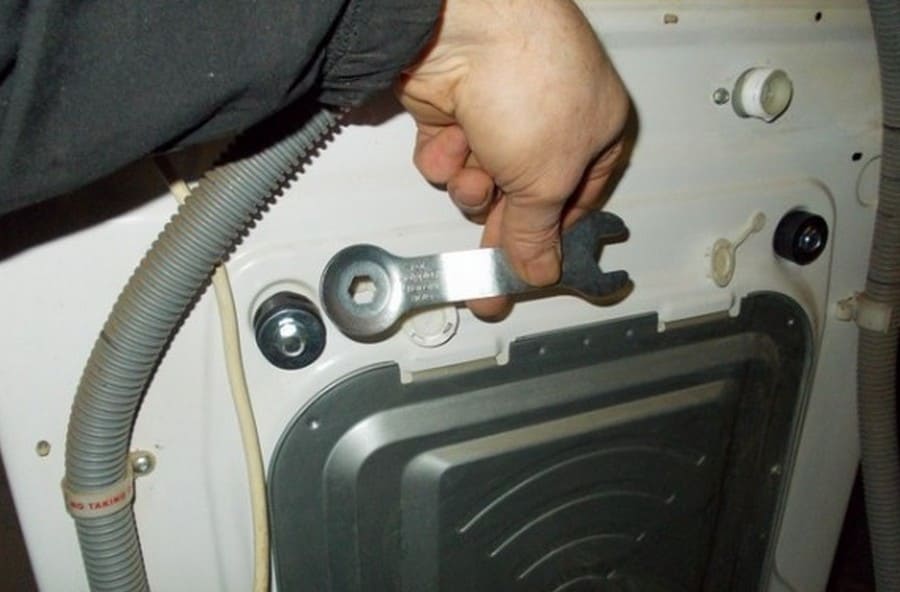
In addition to brackets and spacers, the machine must be freed from locking bolts, which are installed at the factory, so that moving parts of the equipment do not cause harm when moving. If this is not done before turning it on, the device will certainly break down.
Transport bolts can be placed on the rear or front wall cover. Their exact location is indicated in the accompanying instructions. On different models there are from 4 to 6 pieces.
Most often, the bolts can be unscrewed with a ten-point hexagon, a spanner wrench, or using a screwdriver and a corresponding socket head. Continue to twist until the bolt comes out of engagement. After this, they pull it out, grabbing the rubber coupling. With some effort, the bolt, along with the washer, polymer insert and coupling, is pulled out of the holes.
Special rubber plugs, which are included in the kit, are installed in the free space. The bolts must definitely be preserved, since without them it will be impossible to safely transport the machine in the future, resell it, return it to the store or give it to a service center. They are a mandatory component of the package.
Connecting the machine to the water supply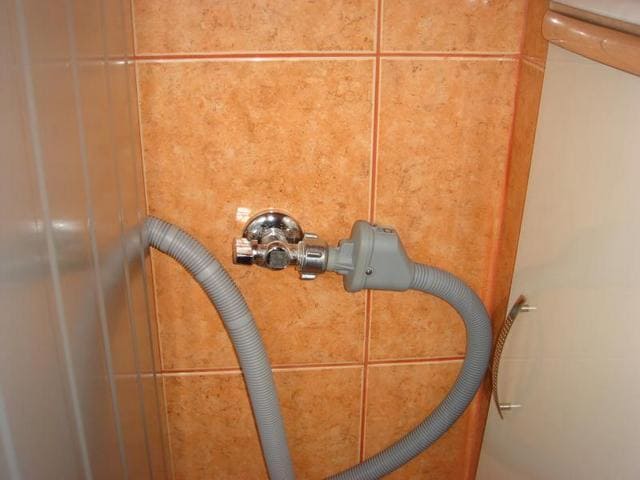
Most machines are connected only to cold water, and the heating element of the device heats it to the required temperature. But sometimes there are models that require separate supplies to cold and hot water.
Quite often the machine is connected to the toilet cistern. This is the fastest and easiest method of all existing ones, but, unfortunately, it is not always convenient to use. To do this, perform the following steps:
- Shut off the water supply in the pipeline.
- Remove the hose leading directly to the tank.
- A tee with two external outlets is installed to drain the water and separate hoses to the toilet and machine are connected to it.
There is an option to connect the machine to the mixer. It can be used for installation in the kitchen or bathroom. To do this, you will need a special tee with a ball valve, with which you will regulate the water supply from the mixer to the machine. Actions are carried out according to the following plan:
- Shut off the water in the system.
- Disconnect the mixer from the pipes.
- A prepared tee is put on the cold water sleeve. An extension cord is installed on the hot outlet, which will correspond to the length of the tee.
- A mixer is installed on top of the tee.
- The hoses of the washing machine are connected to the outlet of the tee. All nuts must be tightened tightly to avoid leaks.
Step-by-step instructions for connecting the machine recommend:
- Before performing work, you need to make sure that the length of the hoses of the machine is sufficient to reach the point where it taps into the water supply. If this is not possible, you will need to purchase appropriate extension cords from a plumbing supply store.
- To begin, the hoses are attached to the outlets on the machine. At both ends there are fittings with union nuts. The first L-shaped edge of the hose is connected to the fitting on the back wall of the machine, and the opposite one is connected to the fitting pre-installed on the water supply pipe. Self-sealing nuts should be tightened by hand, without using any wrenches. You must act carefully, without overtightening, so as not to break the thread.
- A tap must be installed in front of the fitting to quickly turn off the water in an emergency. To do this, use a special tee with a tap or the most common ball valve.When choosing the latter, it is better to play it safe with sealant and tow.
Do not forget about installing special filters in the hoses. They are designed to capture coarse particles of debris: sand, rust and other impurities found in the water supply. The convex side of the filter should be facing the machine.
If there is no free outlet on the pipes, it is necessary to make a tie-in. The steps may vary depending on the material from which the pipes are made.
It is very simple to install an additional water outlet on metal-plastic and polypropylene pipes. To do this, use a regular adapter with one output to metal.
If the insertion needs to be done on a straight section of pipe, use a coupling adapter. It consists of two parts connected to each other using bolts. On one of them there is a threaded hole for connecting the machine hose.
Step-by-step instructions for installing the coupling on metal and polyvinyl chloride pipes recommend the following steps:
- In the place of the pipe where fastening is planned, a rubber O-ring is put on, which will prevent possible leakage.
- Clips are placed over the ring and securely secured with bolts.
- Next, a hole is drilled through the outlet in the water supply.
- A shut-off valve is installed on the outlet, and the washing machine hose is attached.
In the case of tapping into a PVC pipe, it is enough to simply cut the pipe in the right place and join the edges through a PVC tee. The supply hose of the washing machine is connected to the free outlet of the fitting using a threaded fitting. To carry out these manipulations you will need a special soldering iron.
Connecting washing equipment to the drain system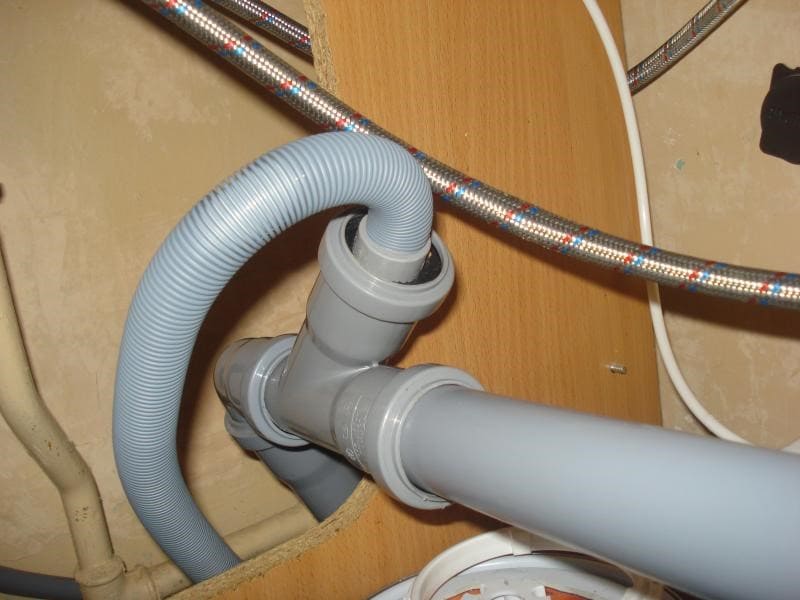
There are three ways to organize the drainage of a washing machine:
- Use a hook to secure the drain hose directly into the toilet or sink. This method, although the easiest, is very unreliable. Usually it is used for a short time before a standard sewer connection.
- Through a siphon under the sink - for this, a special splitter is installed, to the free outlet of which a drain hose is connected.
- A permanent connection to the sewer system at home is the most reliable option. It is great for plastic pipes, but in the presence of thick cast iron pipelines it takes a lot of effort and time.
Connection to the collector is made by installing a special siphon. First, cut the pipe in the right place and insert a tee fitting with an outlet of the required diameter. Then a shut-off valve is screwed to it for emergency shut-off and the drain hose of the machine is secured with a clamp.
A direct connection without a siphon is also possible; in this case, a rubber cuff is used.
When fixing the hoses, do not allow strong twisting or kinking. The only bend should be at 60 cm from the floor. It provides a water seal that prevents the penetration of unpleasant odors from the sewer. There are machines in which the drain hose is on top, and the necessary elbow is hidden inside the device. Some units are equipped with a check valve, so they do not require additional bends at all. This is worth finding out when purchasing equipment or reading in the accompanying instructions.
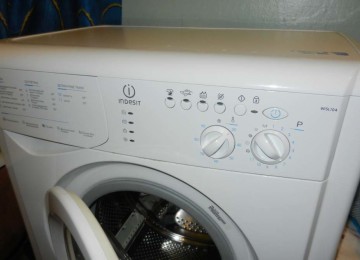
Adjusting the washer level using the legs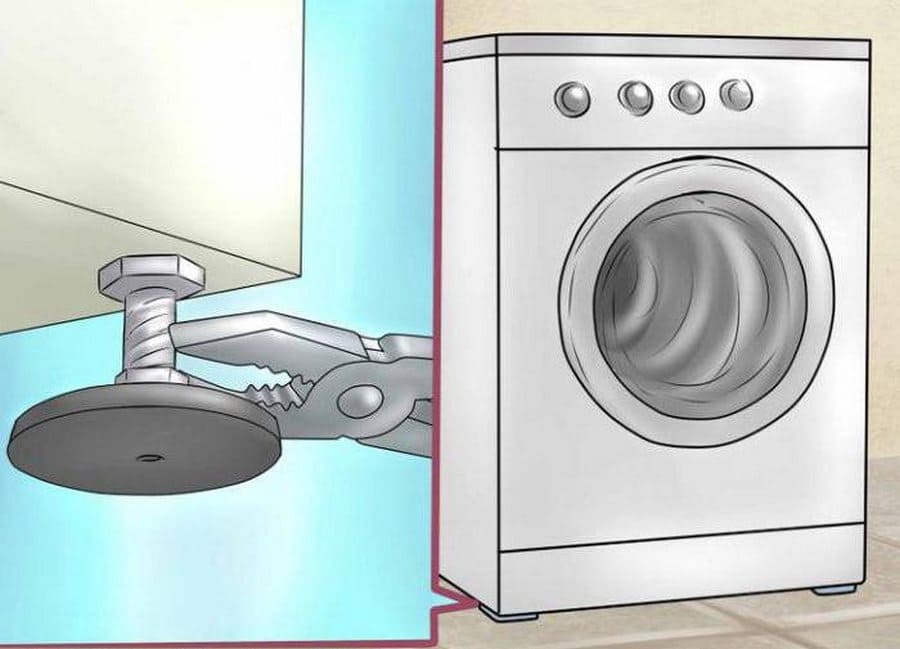
A correctly installed machine should never wobble during operation.Therefore, when installing equipment, it is very important to achieve a perfectly horizontal placement. The slightest distortions contribute to premature wear of rapidly rotating components: bearings, pulleys and drum mounts.
To accurately determine the horizontal position, it is convenient to use a building level. The tilt angle of the installed machine should not exceed 3 degrees.
Since a completely flat floor is an amazing rarity, some errors can be leveled out using the adjusting nuts that are located on the support legs of the machine. By turning them left or right using a spanner, you can easily add or remove 1-2 cm, respectively. After the desired height is set on all four legs, you should securely tighten the nuts to the washer body.
You can prevent unwanted vibrations of the device using special stands. Anti-vibration equipment is sold in stores in the department of additional accessories for washing machines. If you don’t have the time or desire to buy, you can make them yourself by cutting the desired size from a piece of thick felt or rubber.
It is not permissible to place wood, linoleum scraps or paper. The washing mashine will definitely move away from them.
Electrical connection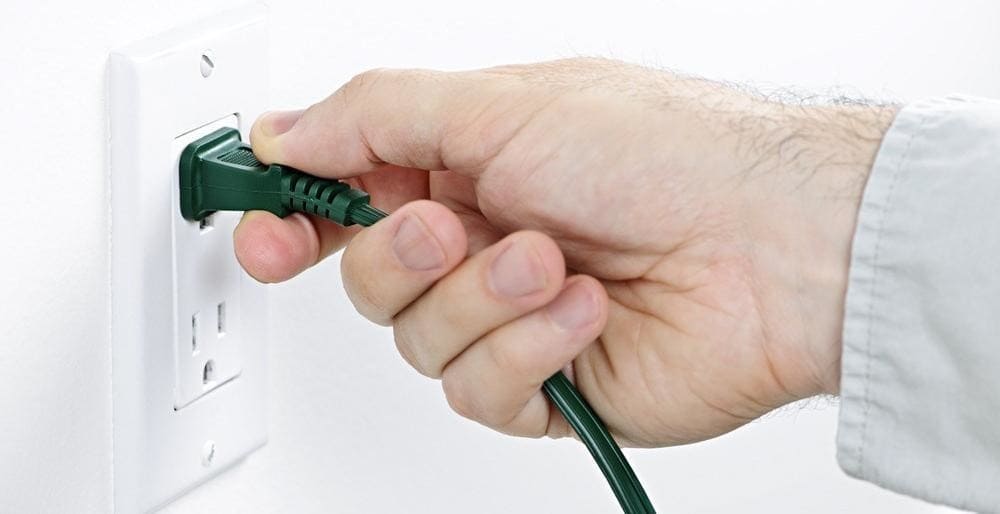
The washing machine is connected to a separate grounded outlet. If there is no grounding, the manufacturer's warranty does not apply.
When installing an outlet, adhere to the following rules:
- The nearest water supply must be at least 0.6 m.
- The distance between the plumbing fixtures and the machine is 2.4 m.
- The height above the finished floor level is from a meter.
It is advisable to choose sockets that are protected from dampness, since there is a significant increase in air humidity in washing areas.
To connect to the shield, use a three-core copper cable with a cross-section of 2.5 square. In the absence of such, you can use aluminum; it also withstands loads well and does not oxidize. You can hide the wires under the baseboard or cut channels up to 3 cm deep. Current laws prohibit violating the integrity of load-bearing structures, so work is allowed only in layers of decorative finishing.
The machine should be placed near an outlet, since the tension of the wiring and power supply through the extension cord can lead to overheating at the junction of the contacts.
The most difficult stage is the installation of the machine and its connection. Before starting work, turn off the packager that supplies electricity to the apartment. Then they install a DIN rail and place the machine on it, insert the wire into the shield, strip the ends and connect it. In this case, the sequence is followed: the blue conductor is connected to zero, the yellow conductor with a stripe is connected to grounding. The third core can be of different colors, mostly brown - it must be connected to the phase. You can secure the wire using a tie.
As additional insurance, or if there is no grounding in the panel, it is necessary to install a residual current device (RCD). It works perfectly on the third wire, so if there is a breakdown on the body, the protection will work before someone touches the device. When installing, strictly observe polarity: the neutral wire is connected to the neutral, and the phase wire to the linear terminal.
You can't take risks with electricity - one wrong move can cost your life.Therefore, if you do not have the necessary experience, it is better to use the services of a professional electrician. He will quickly complete all the necessary work, complying with the stated requirements.
Checking the correct installation of washing equipment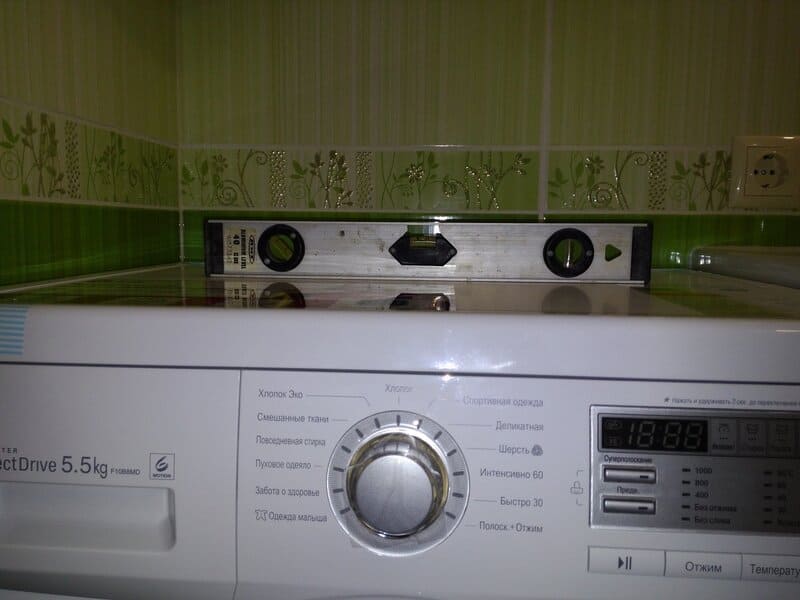
After all work is completed, a test run of the machine is performed. In this case, there is no need to load laundry into the drum, and the mode should be set at the highest possible temperature. This will allow you to rinse the machine from factory oil, dust and other technical debris. When starting a test run, you need to carefully monitor the following points:
- Water collection speed. If the connection is incorrect, low water pressure in the supply hose may occur.
- Draining water - it should drain without difficulty or leaks.
- There should be no leaks at the joints. If there are any, you need to go through them again with seals or tighten the nuts tighter.
- At all stages of washing, water circulation should occur without delay.
- The presence of noise, vibration and other extraneous sounds can occur as a result of unevenly installed equipment or the presence of factory fasteners that were missed due to inattention.
Any problems found should be corrected immediately and the device checked again.
Why does the machine jump when turned on?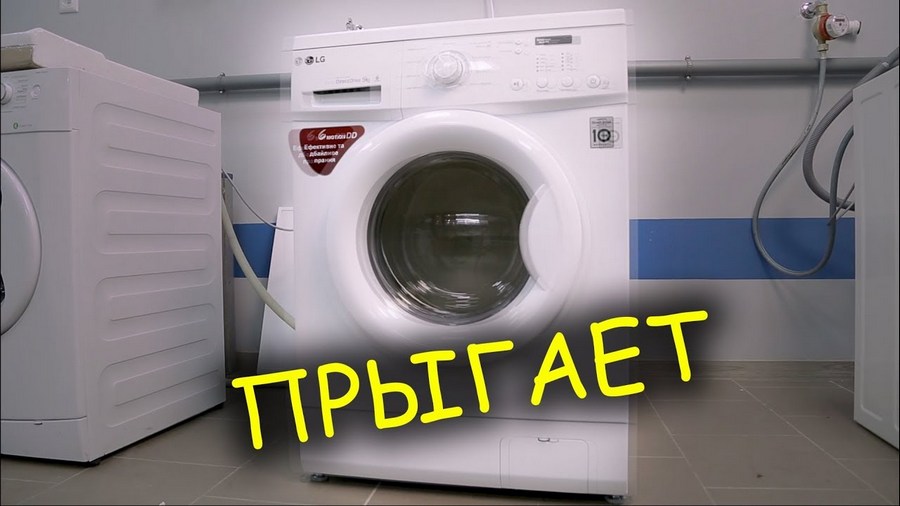
Often, incorrectly installed equipment begins to move without permission at high spin speeds. This indicates errors were made during installation. They directly affect the correct operation of the device. This situation may occur immediately after installation or appear over time. As soon as they are noticed, the cause of the vibrations must be immediately found and eliminated. These include:
- If the surface is uneven or too slippery, you can lay a rubber mat.
- The imbalance was caused by the laundry, which had clumped together in the drum.
- Missed the factory retainers.
In addition, the increase in vibration can be caused by the destruction of bearings, wear of the tank mounting springs, loosening of the counterweight clamps or damage to the shock absorbers. Only a qualified specialist can cope with such shortcomings and should be contacted immediately. Continued operation of the machine in this mode will certainly lead to more serious damage and expensive repairs.
Installing the machine in the hallway or kitchen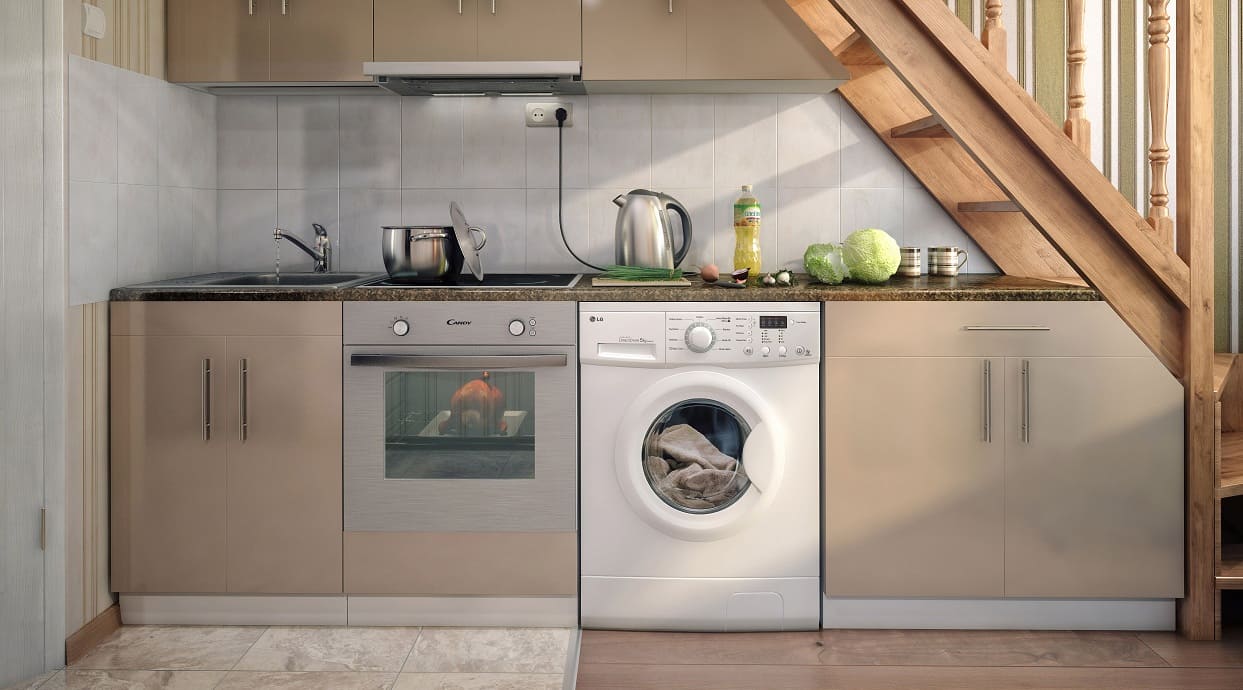
In conditions of limited space, the washing machine is forced to be placed in the kitchen or in the hallway. Often it can be hidden in the kitchen unit behind the doors or placed under the countertop, covered with a curtain. This is very convenient, since all necessary communications are located within close distance from the equipment. For such placement, it is advisable to choose a built-in compact model.
If there is no free space in suitable rooms, the machine is installed in the hallway near the water riser. It is convenient when there is a niche of a suitable size or a large closet in the wall. Unfortunately, this placement option is not the best in terms of sound insulation. Considering the specific nature of the construction of most high-rise buildings, the noise from the operation of the device will be heard throughout the entire apartment. In addition, the issue of laying communications will have to be resolved.
How to install washing equipment on a wooden floor?
The ideal surface for placing the machine is a flat concrete floor. Wooden flooring increases vibrations and their destructive effects.To improve the situation, you need to strengthen the floor. To do this, you can concrete the foundation of the required size, make a durable podium from steel pipes, or lay anti-vibration mats or special stands under the machine’s legs. The range of the latter in plumbing stores exceeds all expectations: rubber, silicone, plastic. They come in different colors and shapes - standard or in the form of funny animal paws. Thin rugs can only slightly dampen vibration, while thicker ones absorb it completely.
All of the above methods are good, but they still cannot provide the same ideal placement as on concrete.
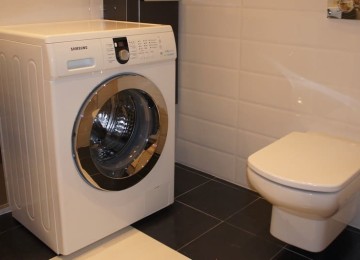
Installing a washing machine above the toilet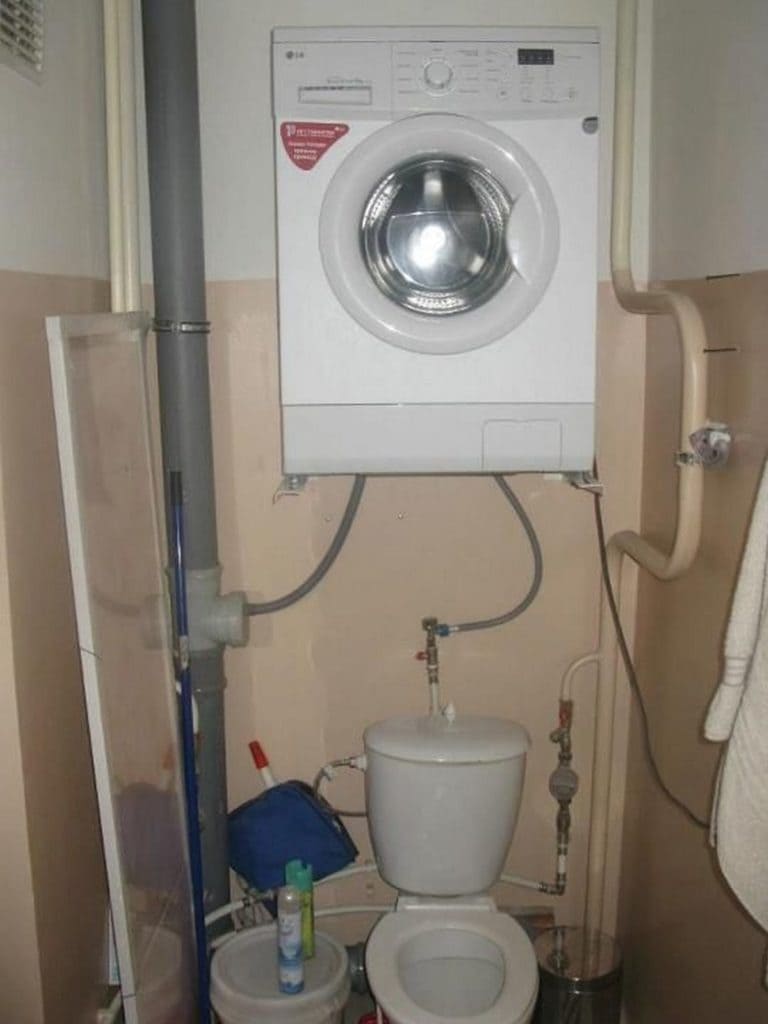
If there is no free space, some enthusiasts install the machine above the toilet. To do this, it is best to choose models with a shallow depth, and also use only the most reliable fasteners. But often the walls in the toilet are thin, and it is not possible to hang heavy equipment on them. In this case, the steel structure is installed on the floor so that it does not restrict access to the cistern. The platform for the machine is equipped with a safety side so that it does not slide down when it vibrates. They also install an additional pull-out shelf that will prevent laundry from falling into the toilet.
When deciding to install equipment above the toilet, you need to understand that this will require certain efforts and skills. Also, do not forget that with each repair the heavy machine will have to be removed and lifted back.
Expert advice on installing a washing machine
Experts do not recommend connecting the washing machine to gas or solid fuel water heaters.They can affect the setup mode of the equipment, which, in turn, will lead to its breakdown.
The most common mistake is incorrectly determining the level of the drain point. If it is not possible to make it at the required height, raise the middle of the hose. In this case, the bend should form slightly above the water level in the machine tank.
Experts also advise installing an adapter on the water supply. It will protect against periodic water hammer in the system.
It is quite possible to install a washing machine on your own without involving professionals. This will require careful and consistent adherence to the steps described above and the availability of the necessary tools. And after a short time you will be able to enjoy the successful result of your work.