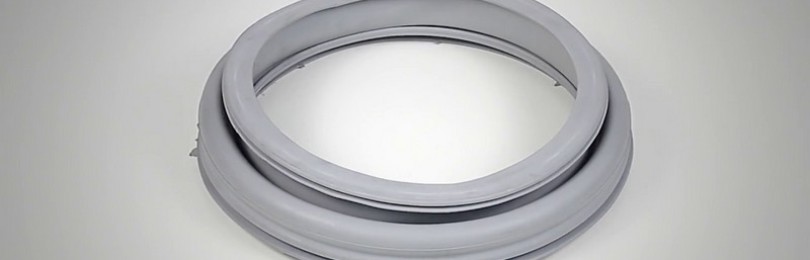
 When holes, abrasions or swelling appear on the seal of the loading door of the washing machine, the seal should be replaced. The work of replacing the seal on the Indesit washing machine will take no more than one hour, and the set of tools required is minimal. It is only necessary to disconnect the washing machine from the power supply and perform all the replacement steps specified in the operating manual. So, how to change the cuff on an Indesit washing machine?
Reasons why the cuff may be damaged
To prevent the process of replacing the sealing rubber from becoming a regular event for you, it is necessary to promptly identify the causes of its damage.
Wear during operation is not canceled, but often the cuffs of Indesit washing machines suffer due to the negligence and carelessness of the consumer.
The sealing element, like others, has a certain strength, but under the influence of negative factors, its operational period is reduced.
It is easy to establish the cause of the damage - you need to carefully inspect the cuff, after which it remains to choose the most likely problem that contributed to the failure of the door rubber:
- friction against hard elements of things, clothes and shoes;
- foreign objects;
- the appearance of fungus, mold, deteriorating the quality of the cuff;
- careless actions when loading and unloading the drum, leading to significant mechanical damage.
The drum cuff is damaged by aggressive detergents, frequent use of the device, strong vibration during spinning, and hot water.
To maximize the service life of the cuff and postpone its replacement, it is necessary to clean and dry the sealing element, carefully inspect the pockets of items before washing, and do not increase the permitted amount of washing powder.
The ideal option is to regularly inspect the cuff for existing defective areas.
Dismantling the rubber band on the drum of the Indesit washing machine
Damage to the cuff is not a reason to replace the washing device. This type of repair work is much cheaper than replacing a control module or failed electronics, and any owner of this brand can handle it.
First of all, you need to prepare for the replacement. A new rubber band is purchased, similar in diameter and markings to the damaged one. The machine is de-energized, wiped inside with a rag, and you can dismantle it:
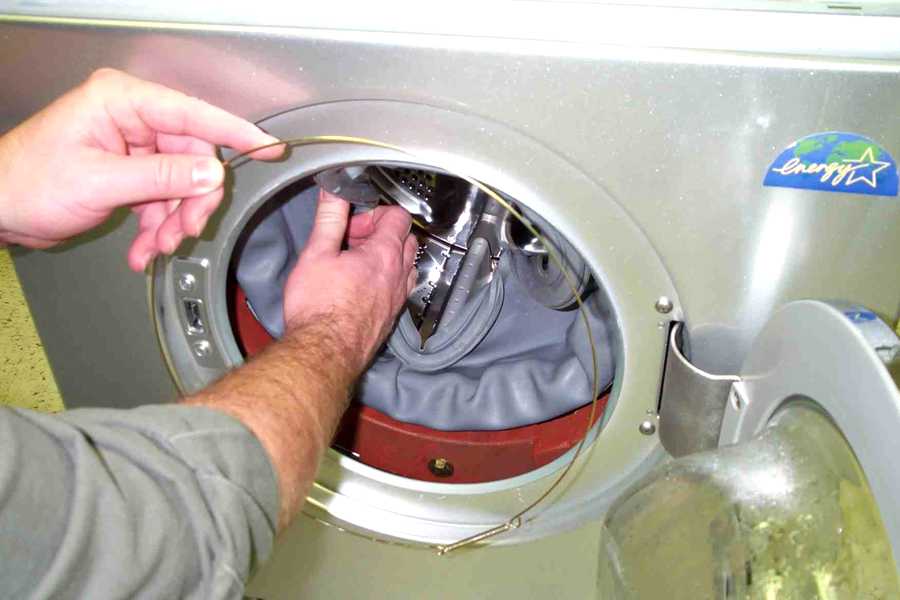
- clamps in the form of clamps are removed. If they are made of plastic, then hold the joints of the pair of latches and pull them forward. And if the rims are made of metal, unscrew the screws or pry up the spring using a flat screwdriver;
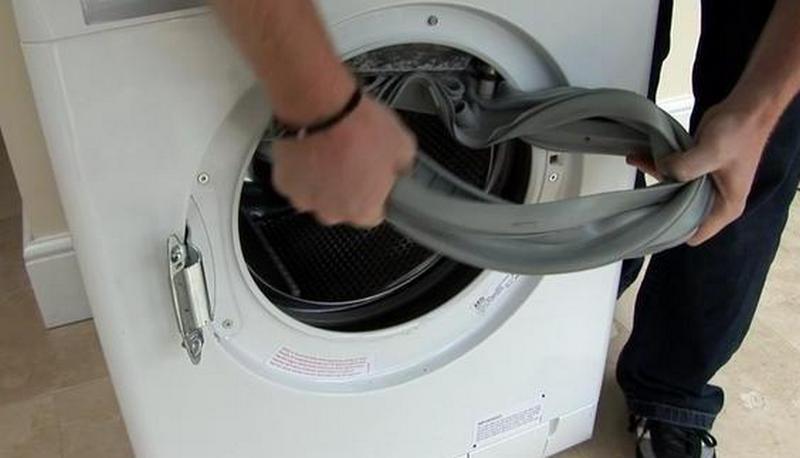
- carefully pull out the front part of the cuff;
- we find a mark that marks the required location of the elastic band in relation to the SMA drum (as a rule, this is a characteristic protrusion);
- Using a marker, we apply a response mark on the body;
- To remove the sealing rubber, pull it towards you, removing it from the recess.
After dismantling the damaged seal, you should not rush to replace it with an analogue one. First, thoroughly clean the edge from dirt, scale and remaining washing powder.
How to install a cuff on a washing machine
Before installing a new element, you need to compare it with the dismantled one to make sure it is similar in size. After this, we find the places where the cuff is fixed:
- there will be a triangular protrusion on top, which, during installation, fits into the tank mark;
- for the bottom, not only marks, but also drain holes can serve as reference points.
Tagging is an important feature. Otherwise, the cuff will move, and over time, damage will appear on it again.
Replacing the cuff on an Indesit washing machine starts from the top point, its protrusion should be aligned with the mark. Supporting the upper section, we press the second rubber seal inside. Then, moving from the top point to one side, the inner part of the elastic band is put on the washing machine tank.
To make it easier to put on the cuff, it is recommended to view it from above, looking through the opening of the dismantled cover. Having attached the inner part of the seal, check the alignment of the marks. If they move during installation, it is best to remove the sealing collar and re-install.
Now we move on to installing the clamps. This stage of work is the most labor-intensive. For convenience, it is recommended to tuck the outer edge inward and disable the hatch lock by unscrewing a couple of screws.
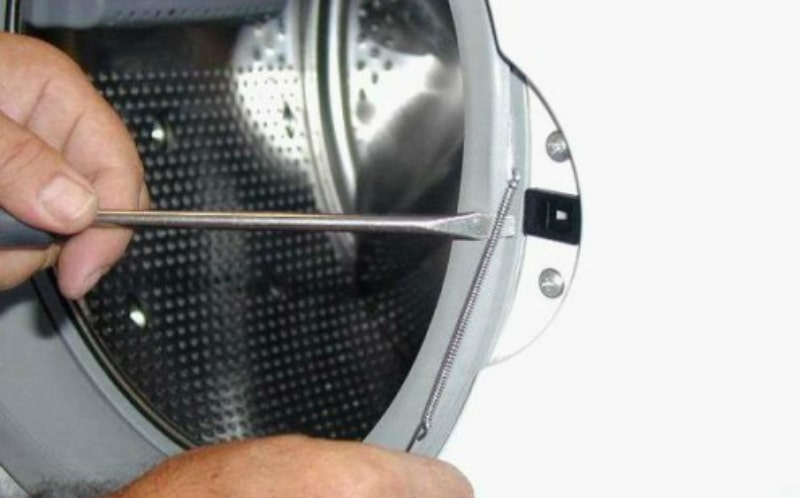
A screwdriver is inserted into the hole under the blocker, and a clamp clings to it. This is necessary so that when tightening it does not jump off and remains in place.
The clamp is tensioned around the perimeter in a convenient direction, while the position of the screwdriver is constantly monitored. This is especially important if you are working without a partner. The fact is that with any loosening or sudden movements, the screwdriver moves and the spring slides off. Once the spring is fully inserted and located in the recess of the seating point on the seal, you will have to hold it and carefully remove the screwdriver.
Now we probe the entire perimeter of the spring with our fingers to make sure that it fits into the recess everywhere, and that the cuff edge fits exactly against the tank, without jams. If loose spring connections are detected, they are corrected.
If you fail to place the cuff tightly in the intended place, the likelihood of leakage increases.
At the same working stage, you should make sure that the Indesit washing machine is tight after installing the purchased cuff:
- water is poured into the tank in such a way that it does not flow out of it;
- when no leakage is detected, the spring is inserted correctly;
- otherwise, the area of leakage is determined, the liquid is poured out, the problem is eliminated, and a recheck is performed.
Before attaching the outer part of the sealing collar, the door lock is installed and the fastening screws are tightened. The front part of the seal is curved in a certain shape, corresponding to the bend of the edge of the hole in the front panel of the Indesit washing device. Having bent the front part, it must be pulled onto the body of the washing machine, performing similar steps in a circle.
When the rubber part is completely put on the front, you will have to inspect it and feel it to completely fill it.
The final stage is the installation of the external clamp.It doesn’t always work out in one go, because the spring is quite stiff. But there are ways:
- taking the clamp from both ends of the spring, stretch it, insert it into the recess, and, continuing to hold it, put it on completely;
- You can fix one spring end and pull it to the side, placing a clamp.
Conclusion
Now you know how to properly replace the sunroof rubber. If you follow all the recommendations exactly, such work on an Indesit machine can be done on your own.


