 High cost is becoming a hallmark of some types of renovations, which can be a big hit to your wallet. That’s why many people try not to turn to experts, but to solve problems on their own whenever possible. If there are only home conditions, it is easy to fix the malfunction if there is no need for special equipment. Every craftsman can remove the rubber band from the drum of a washing machine and install a new one.
Main features and recommendations
Cuffs exist in washing machines for a reason; the part is responsible for some important functions. Among them:
- Protection against liquid leakage during washing.
- Creating obstacles to the penetration of liquids and detergents into other mechanisms.
Wear or failure leads to the need to replace the part. The most common cause is damage due to sharp objects. Because of this, smudges appear at the device itself. Anyone can change an elastic band, but this job is of average difficulty.
What other reasons could there be for the malfunction?
Cuffs also become unusable under other circumstances:
- Operation over a long period of time.
- The appearance of defects due to the presence of mold and fungi. This happens if the doors are closed very tightly after the washes are completed. Or when washed clothes are left inside for too long.
- Use of harsh cleaning agents.
- Using items with large dimensions that do not wrinkle or fold.
- When loading and unloading are carried out sloppily.
Most often, devices fail because the user handles them incorrectly. Fulfilling operational requirements and selecting suitable cleaning products will be an excellent option to extend the life of the device. This makes it easier to postpone replacing rubber bands, or to do without such repairs altogether.
Manufacturing companies that have taken leading positions sell parts whose wear is minimal. On average, they last up to 10-15 years.
The appearance of the first signs of the need for repairs
The following circumstances and facts will tell you when the rubber band needs to be replaced:
- Hissing or rattling noise, even during normal wash cycles.
- Inability to close the hatch properly.
- Formation of puddles under the machine during operation.
The washing program stops immediately if at least one of the above defects appears. The device must be disconnected from the power supply. Next, measures are taken to determine the causes of the malfunction. And repairs are being carried out.
Where does the repair begin?
The tank does not need to be completely disassembled when it comes to the following models:
- Beko;
- Vestel;
- Haier;
- Samsung;
- Hotpoint Ariston;
- Candy;
- Indesit.
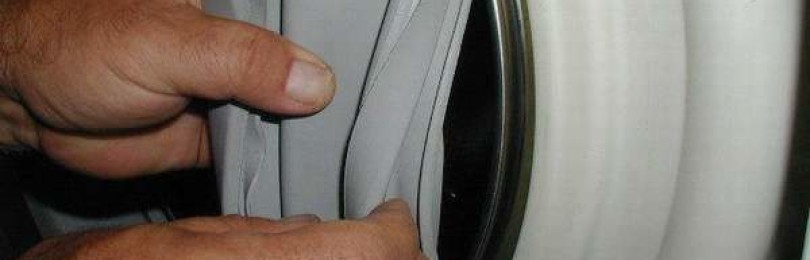
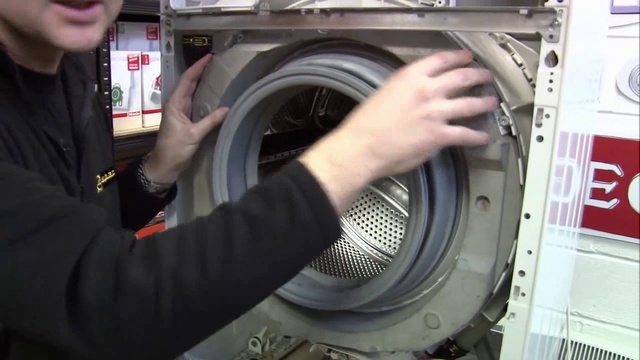
To secure the cuff, strictly use the body in the upper part.To provide access to the contents, it will be enough to open the hatch. After this, it will be easy to figure out how to remove the rubber band from the drum of the washing machine.
In theory, removing the cuff rarely requires significant additional effort. Only in some cases is it recommended to remove the hatch door to make the work more convenient. For example, experts recommend doing this when working with Indesit washing machines. Indeed, in this case, the edge of the cuff and the fastening are too close to each other.
To complete the work you will need the following steps:
- Two screws are unscrewed.
- Slight shift of the fastening to the upper part.
- The design stretches towards the user.
After this, the door is detached from the body in front, along with a special door. It is permissible to begin repairing the cuff itself.
Replacing the rubber band on Bosch washing machines is somewhat more difficult compared to its competitors. You have to remove the front housing. The work involves performing the following actions:
- We unscrew the fastening and get rid of the top cover.
- Remove the dispenser where the powder is usually placed.
- We gain access to the place where the control panel is located. Unscrew the bolts and dismantle the part.
- Remove the base panel.
On LG washing machines it is recommended to follow the same procedure. After completing everything necessary, full access to the seal is available.
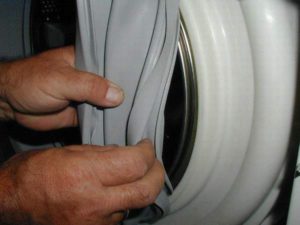
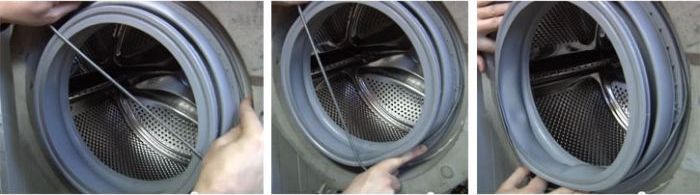
Instructions for removing the first clamp
Removing the clamp is a mandatory step to gain access to the seal itself.
- Determine the position of the plastic-metal holder. It is located on the side of the cuff.
- To dismantle it, you will need to unscrew the screw that facilitates retention, and then pull the spring part towards you. First pry it off using a flat screwdriver.
- All that remains is to pull out the plastic part where the locks are located.
After this, the edge of the cuff can be easily removed from the front panel.
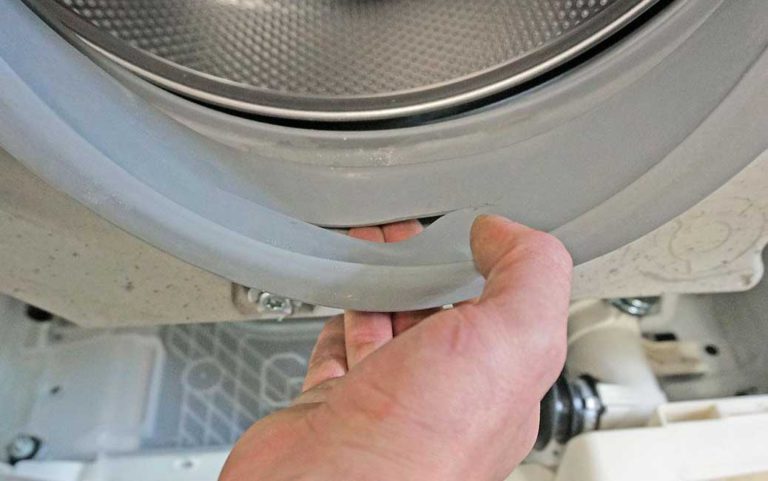
Tips for removing internal clamps
You need to find the location of the seal and all the parts, and then remember where and what is located. It is recommended to make special notes for this. Then the new cuff will be installed correctly, following the recommendations for maintaining tightness.
After this, dismantling of the internal holders is allowed. It is enough to pull the device in your direction. At the next stage, the elastic band is changed, the grooves are completely cleaned if necessary. You can use a soap solution, it makes the work easier in the future.
Let's start installing the new cuff
It is standardly recommended to compare new and old parts with each other before starting work. Identical dimensions are an important condition. Seats along with marks at the top and bottom are marked separately.
The location of the top mark is often marked by manufacturers with a special ledge. When the elastic band is changed, you need to separately monitor the connection between the parts.
Holes for draining liquid occupy the lower part of the structure.
Installation must be carried out strictly based on where the marks are located. Otherwise, the seal is likely to move and be damaged during dismantling. Direct installation begins from the top edge:
- With one hand, tuck the cuff into the grooves. The other simply holds the product.
- The tank is completely closed with the inner edge.
Replacing rubber bands on washing machines from Indesit and other manufacturers does not in every case require dismantling the cover with the front panel. But disassembling the case will help even those who are not professionals. This will allow, for example, a better overview, making it easier to determine correct installation.
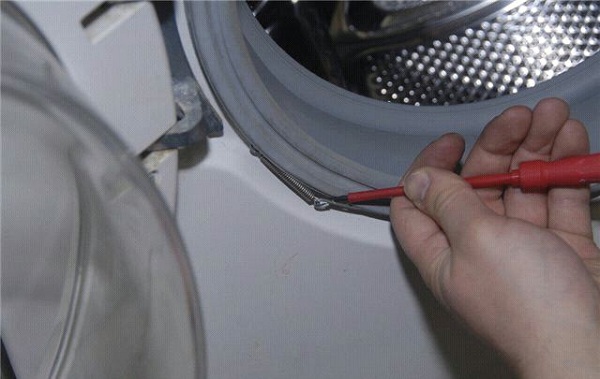
Internal clamp: correct installation
In repair work, this is one of the most difficult moments. Only after checking the correct installation of the cuff, the master begins to restore the clamp:
- Several bolts are used to keep the hatch locked. They get rid of them, it’s more convenient.
- A screwdriver is inserted through the blocking hole. After this, you need to hook the clamp so that it is fixed for further work.
- The next stage assumes that the part is stretched around the entire perimeter, the direction does not matter. The main thing is to control the fixation, along with the tension force. The clamp easily comes off with any careless movements. After this, the work has to be repeated again.
- The screwdriver is pulled out as soon as the clamp is in place.
- All that remains is to check how correct the installation was. The planting density should be high enough.
Last stages
The clamp returns to its place at the top when the process ends. To do this, the spring is specially stretched, then the part needs to be recessed into the grooves. The next stage is to pass along the entire perimeter, without weakening the tension. This type of work cannot always be completed the first time.
Next, you just need to see how well the process is completed. The door is reinstalled and the tightness of the structure is checked.
Conclusion
When the repair is completed, the machine can be started using the rinse mode. Half an hour should be enough to understand whether the repair was carried out correctly and whether the replacement requirements were met. Next, they drain the water and tilt the machine to inspect the cuff. The job is done efficiently if the bottom of the rubber remains dry. On average, the same work performed by a master costs up to 2,000 rubles. Specific numbers depend on individual conditions and the type of washing machine itself.
If the master recommends using his own consumables, then you should study the accompanying documentation. Only high-quality components will allow you to obtain durable results and extend the service life.


