The cuff in the washing machine plays an important role. But, like any other unit, it can fail. This is usually indicated by water leaking from under the door of a working device. There is nothing wrong with such a breakdown, because... You can solve the problem on your own, without calling a specialist. The main thing is to follow a certain algorithm of actions and not ignore precautions.
What is a washing machine cuff?
In simple words, this is a rubber part that is installed in the area of the unit hatch. It provides sealing during the process of clogging the loading tank during operation of the device. It is due to this layer that not a single drop of water can leak out.
Where the cuff is located and what type it is depends on the model of the automatic washing machine. If we are talking about front loading, it ensures the connection of the tank to the front wall, and the shape is round. If the loading type is vertical, the part connects the tank and the upper wall, and is also presented in the shape of a rectangle.
Some time ago, seals were made from highly flexible rubber, although today the situation has changed. Currently, cuffs have a similar material, but it is mainly silicone. It retains its elastic properties, regardless of temperature. It is also worth noting that the cuffs belonging to different models are different in size and shape.
Types of cuff and its purpose
The type of cuff is determined by the design of the automatic washing machine. If we are talking about vertical loading, and the splash protection option is provided, the element does not come into constant contact with water.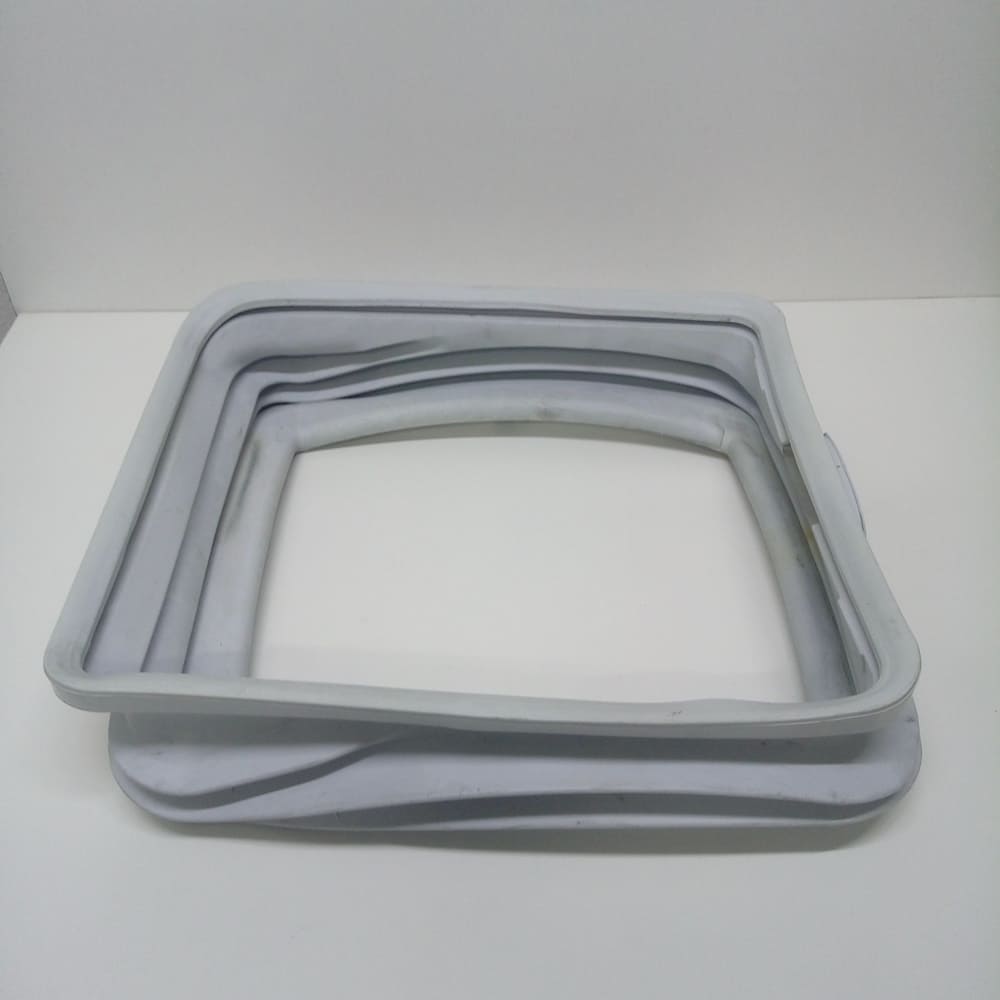 Tightness plays an important role in the case of spinning, because water simply cannot fly away in different directions under pressure. In such machines, the cuff is a guide for water drainage, and the tightness is ensured solely by the lid.
The remaining details depend on the design features of the tank. If the body part is a water container, a cuff of increased flexibility is not required. If the tank acts as an independent element and is suspended on shock absorbers, the cuff is attached to the frame and the tank at the same time. In this case, it is possible to provide a sealed sleeve that does not allow water to pass through in the joint area.
If the design of the machine provides for a front-loading type, the cuff is assigned a more important role. Along with providing protection against splashes, it holds the water mass while filling the container. The sleeve is constantly in contact with the liquid, and the load is uneven. The upper area is washed by splashes and waves during the operation of the drum. The lower area is almost always filled with water, which in turn can be cold or hot.
To ensure constant and tight contact with the hatch, it is necessary to ensure that the material has optimal performance parameters. To solve these problems, modern manufacturers are forced to seek a compromise.
On the one hand, they provide an increased level of product strength. On the other hand, the absence of hardening of the material due to temperature changes and the influence of aggressive detergent compositions plays a role. Compliance of the cuff with hygiene standards plays an important role.
What materials are the cuffs made from?
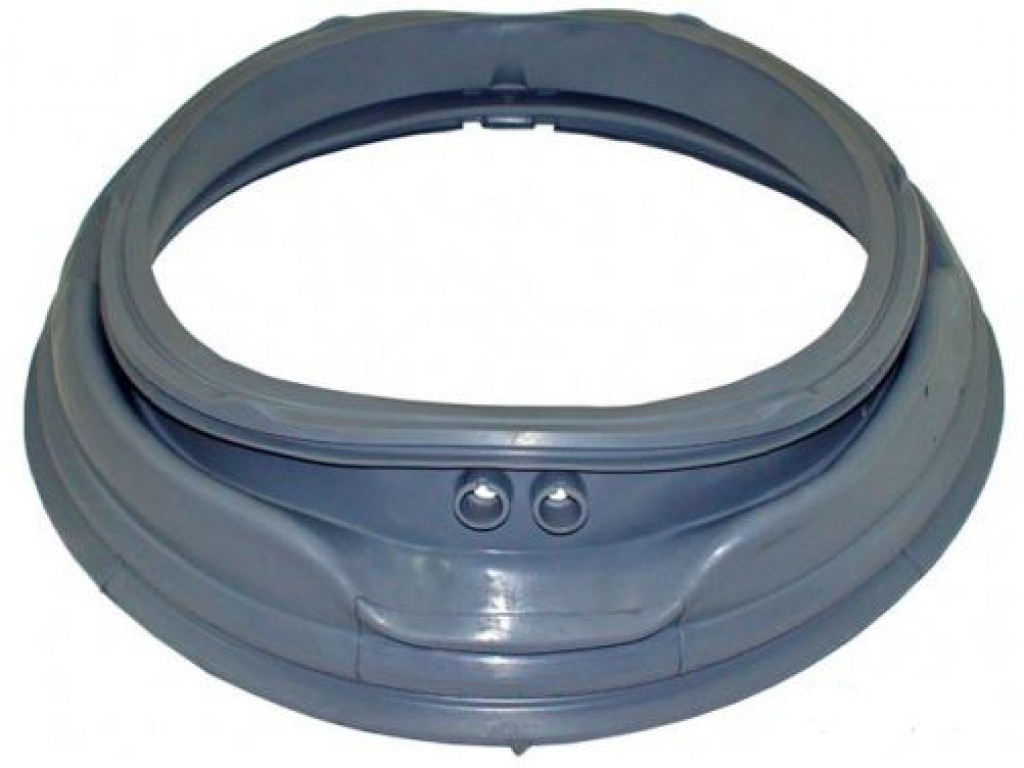
When removed, the cuff is a sleeve, which is characterized by a cylinder or rectangle shape. Everything depends solely on the design of the loading hatch and the type of device, which can be vertical or frontal. Certain features apply to products that have a clothes drying mode. An outlet is provided in the area of the working wall.
As for the ends, they have clamping-type sides, which are characterized by a complex shape. It is due to them that the product fits as tightly as possible to the flanges of the body and tank. The fastening itself is very tight, but when heated, the material has the ability to expand.Therefore, to ensure increased reliability, the sides are fixed with clamps or springs.
A similar type of tie is used in the case of a rectangular cuff. The exception is a design in which the bottom hangs completely into a container attached to the body part. The material used in production is classic: it is rubber with an impressive rubber content. As for vulcanization, this process is carried out in a special way in order to maintain maximum softness and elasticity. Along with this, the mixture contains additives that provide the cuff with protection from tanning under prolonged exposure to liquid.
Reasons why cuffs fail 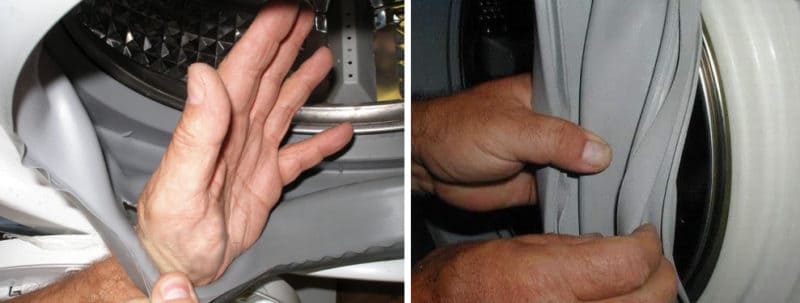
If a breakdown occurs in a front-loading machine, this will entail more serious consequences than in a vertical-type device. Most of the faults occur for the following reasons:
- natural wear and tear (even in the most durable material, vibration along with variable loads leads to rubbing of the rubber, it is useless to fight this, therefore, if the part becomes unusable, you just need to replace it);
- damage due to the impact of sharp clothing fittings (decorative fasteners and buckles, sharp objects left in pockets - all this can lead to a cut of the rubber element, and if this happens, it is unlikely to be possible to save it);
- use of overly aggressive detergents (some chemicals lead to the dissolution of vulcanization, as a result, the rubber becomes less durable, so before washing you need to carefully read the composition of the products);
- fungal infections (over time, these bacteria spoil absolutely everything; timely cleaning of the washing machine and its regular ventilation will improve the situation; to ensure prevention, it is customary to use detergents that contain citric acid).
Practice shows that the lion's share of breakdowns occurs due to careless handling of equipment. Only compliance with operating conditions and regular preventive measures will lead to a long service life of both the cuff and the device itself.
Rules for choosing a new cuff
In order for the cuff to be connected correctly and reliably, it is not enough to simply buy and install it: you will need the right approach to choosing a device. Several parameters should be taken into account:
- first you need to determine the diametrical cross-section of the pipe - outside and inside, so that the seal fits well to the walls;
- You should buy a product whose elastic band is as dense as possible so that it tightly grips the pipe; only with this approach can reliable fixation be ensured, especially in conditions of draining water and spinning things.
If the cuff is purchased separately from the tee (and they are usually sold as a set), you will need to follow similar rules. The main thing is that there are no cracks or holes in the product. Experienced plumbers say that it is worth purchasing a product that is made of modern alloys, because... They last a long time and are reliable.
After purchase, proper installation of the cuff will be required. The procedure for this is as follows:
- you need to insert the tee into the connector area, the rubber band for sealing is not removed;
- after this, the device is securely fixed, and the cuff itself is installed in the hose connector;
- subsequently a drain hose is threaded into it.
After this, the installation process is considered complete. If the cuff is installed in the tee itself, the seal is fixed to the sewer pipe. After this, the hose itself is inserted. So, the purchase is optional, but very desirable. And since the device itself is inexpensive, saving on it is unacceptable.
Tools needed to replace the cuff
Replacing the cuff is a fairly simple process, especially if you follow simple instructions. The first thing to do is check the product for damage. Only after this can you insert it into the device. To do this, you need to remove the old part by removing the clamp that held part of the cuff attached to the wall in front. After inspection, a decision is made as to whether the rubber will be repaired or replaced. The tools that are required for this are few:
- flat-type screwdriver;
- slotted screwdriver;
- new cuff;
- glue (if the part will be repaired and not replaced).
In some situations, additional adaptations may be required. The main thing is that they are used in a certain order and are of high quality.
Replacing the rubber seal yourself
To replace the cuff yourself, you need to follow a certain algorithm of actions. To understand the order of events, it is worth familiarizing yourself with it in more detail.
Removing the front clamp
The clamp is attached to the front wall in different ways, depending on the specific model and the material from which the part is made.In general, there are three main options - using latches, springs and screws. The first method is ideal for plastic clamps, the rest - for products made of metal material. In any case, you cannot do without using a flat-head screwdriver.
The further procedure depends on the type of fastening. The screw is unscrewed, the spring, in turn, is pulled back and weakened, the plastic clamp pulls towards itself at the junction of the latches. After this, the clamp is removed using a screwdriver. Although the procedure seems simple, difficulties may arise in practice.
The fact is that some brands produce models in which you need to remove the front wall to remove the elastic band. These are Samsung, Siemens, LG, Bosch, etc. Doing this work on your own is very problematic, but if you want, everything is possible. The main thing is to carry out the work carefully to avoid damage to wires and contacts.
Removing the Bezel
The first thing that must be done is to remove the unit from the electrical network and make sure that there is no water in the drum and sump. Only after completing these steps can you remove the front panel. To get directly to the screw, you need to remove the powder receiver by pulling out the tray all the way and pressing the corresponding key.
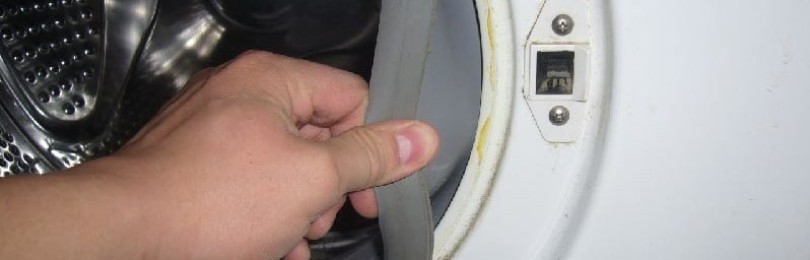
After this, all that remains is to open the hatch and disconnect it. It is located in the lower area of the front wall of the unit. To do this, use a screwdriver to unscrew the mounting screw. After this, the hatch door is opened, the clamp is removed, which secures the cuff to the panel located in front.
This is easy to do by using a slotted screwdriver to pry the spring and then remove it along with the clamp from the groove of the seal. After that, the edge of the cuff is pulled out of the recess in a circle, the rubber band is sent to the inside of the case, and the hatch door is latched. All this will allow you to get to the upper screws, which need to be unscrewed, and then move the panel forward a few centimeters. After that, all that remains is to hold the wall in the air and disconnect the plastic fasteners from it. After that, do the same with the locking contacts.
Dismantling the old cuff and inspecting it 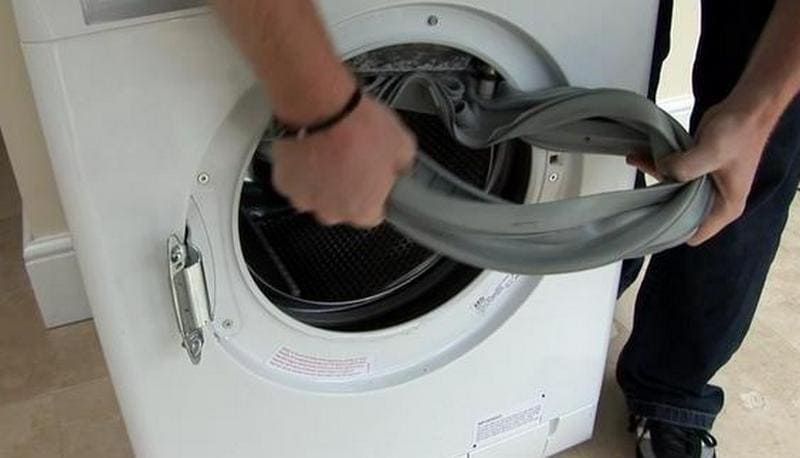
After the front clamp is removed, you need to completely remove the rubber seal. The procedure in this case is as follows:
- The front part of the rubber seal is carefully pulled out, before that it is held on the body of the washing mashine due to its own tension;
- After that, the mounting mark is found, which is on the cuff;
- using a marker, it is marked in the tank area;
- the second clamp is removed using the same principle as the first.
After all the work is done, it will not be difficult to remove the cuff from the machine. To do this, you just need to pull it towards you.
Preparing a place for installing a new cuff
The cuff needs to be replaced when cracks and other similar damage appear on it. In this case, you can safely install a new "rubber band". As a preparatory step, you need to completely clean the edge of the tank, because this is where a large amount of dirt usually accumulates. The remains of household chemicals - products used for washing - also end up there.
Cleaning activities are best carried out using a sponge, which is periodically moistened in a soap-based solution. There is no need to rinse off the remaining foam, nor do you need to wipe the part dry. The fact is that soap becomes a lubricant and allows you to cope with the process much faster.
Installation of a new sealing rubber
You can put it on yourself, but this process involves some difficulties. Firstly, the material is difficult to stretch; moreover, it causes resistance and stubbornly “refuses” to fall into place. Therefore, you first need to attach the element to the edge area from above and do this in such a way that the mounting marks easily match. After this, you need to slide over the rubber with your thumbs to properly tighten the cuff.
In the next step, it is recommended to use a special lubricant made from soap. The cuff is stretched in the lower area, so putting it back in place is problematic. Therefore, in this area, the seal must be placed on the tank. After completing this work, the rubber is held tightly on the edge.
At the last stage, it is necessary to ensure that the part is installed correctly. If there are areas of loose contact with the metal base, there is a high probability of leaks occurring during operation of the machine.
Installing the Inner Clamp
There are several options for solving this problem, mainly it all depends on the type of fastening. If we are talking about spring-type tension, a screwdriver is used to carry out installation activities. The tool is inserted into the hole responsible for blocking the hatch, and then a spring is put on it.As a result, the fastening stretches, and the clamp is easily put on the required place.
If there is a clamp equipped with a screw, this task is solved much easier. In this case, the tension is almost 100% unscrewed, and the clamp, in turn, is placed on the landing area. In order for the part to be strengthened, you only need to tighten the screw.
If the washing machine has a clamp made of wire, and there are no tensioners, round-nose pliers are usually used as an additional tool. They are needed to carefully tighten the ends of the metal, and the knot that is formed in this case is hidden in a special recess on the cuff.
Practice shows that it is most advisable to use a clamp made of plastic. It is fastened using latches. After the work is done, the cuff is pulled over the edge of the panel from the front and fixed using a clamp. Upon completion of the work, the seal is checked for leaks. To do this, the quick wash mode is launched. If there are no leaks, the cuff is installed rationally.
DIY cuff repair 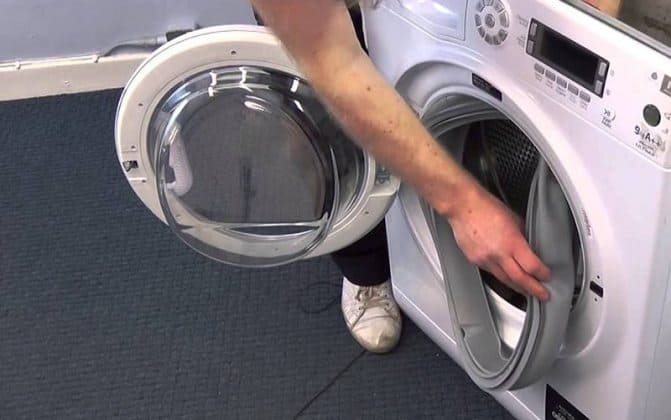
In some situations, instead of replacing the cuff, it is repaired. For example, when it is currently impossible to find the necessary part, or delivery requires a certain wait. Or when there is no way to allocate money from the budget, and washing must be done regularly. In such cases, the cuff is simply sealed.
It is worth noting that this process is a temporary measure, so it is necessary to completely replace it as soon as possible.
Preparing the cuff for sealing
The first step is to organize an inspection of the leaky part and find out why it was damaged. Only with this approach will it be possible to determine the feasibility of repairs. Indeed, in some situations it is easier to wait for a complete replacement without gluing. To carry out the test, you need to remove the cuff from the machine using the method described above.
If the size of the cut, puncture or abrasion is insignificant, repair definitely makes sense. If the damage is large, there is no need to seal it. The next step is to select the material that will be needed for the patch. It must have an increased level of strength and at the same time elasticity. An excellent option would be to use patches that are designed for repairing air mattresses; they can be purchased at specialized sporting goods stores.
As for the glue that will be used during the work process, it must have excellent adhesive properties. The substance itself should be elastic after it is completely dry. This is exactly how compounds that are usually intended for repairing rubber products and shoes behave.
Instructions for sealing the cuff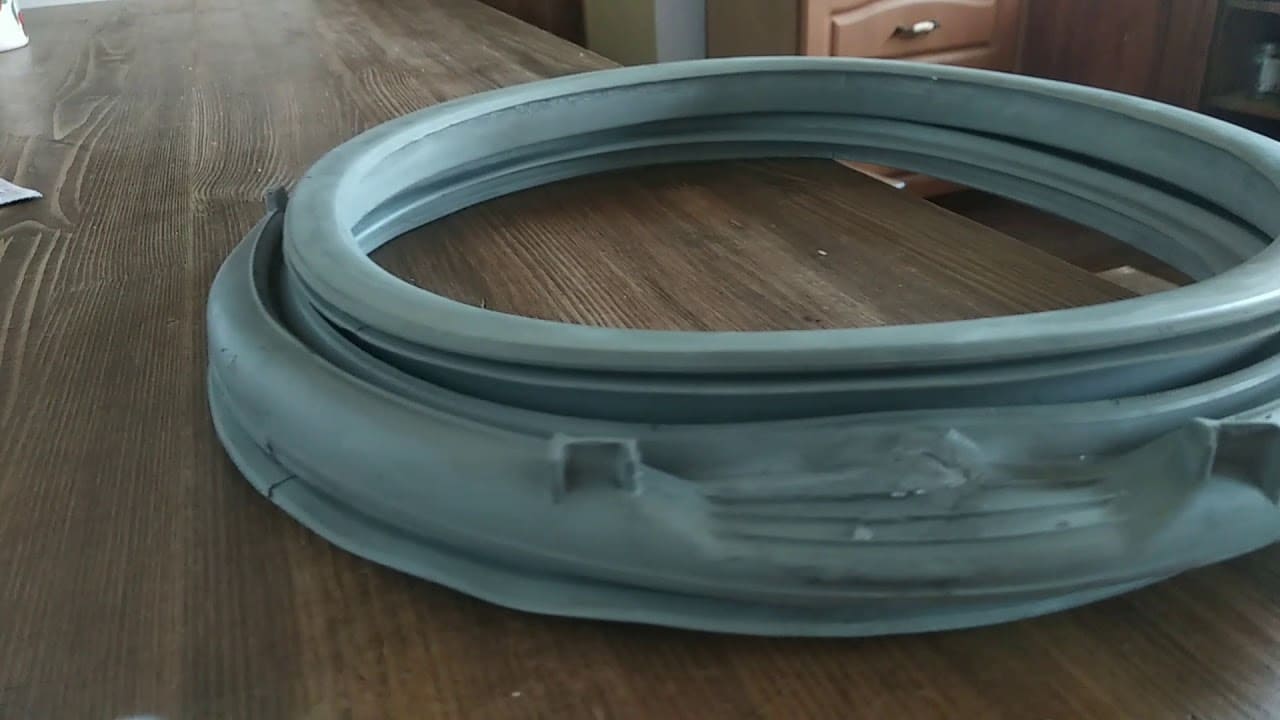
The process of sealing the cuff itself is simple. But so that the result does not disappoint, it is recommended to adhere to a certain procedure:
- first, a patch is prepared from the previously selected “raw materials”, folded in several layers (its size is one and a half or two times the diameter of the defect);
- then the damaged area and the area around it are disinfected, this is done using acetone, alcohol, white spirit, etc.;
- an adhesive composition is applied to the cuff itself;
- after this, the surfaces that have been lubricated are pressed one against the other (this can happen immediately or after some time);
- the element is then fixed in its natural position using objects considered most suitable.
After this, you need to leave the part for a day, and when the glue is completely dry, install it in place. Along with this, there is another method of gluing the cuff, which is considered more reliable among ordinary people and professionals:
- first, the damage is stitched using a thick thread;
- this area is then impregnated with a silicone-based sealant, it should be designed for rubber and plastic.
After this, as when using the previous option, the cuff is left in its natural position for one day, and then installed again in the washing machine body. Then it will be necessary to check the quality of the work performed. To do this, you need to load the drum with laundry (fully), and then start the wash on the shortest mode. When the cycle comes to an end, the bonding area should be carefully inspected to identify repeated breaks, if any.
Conclusion
The cuff in the washing machine is extremely important, so it is necessary to maintain it in good condition. If defects occur, this part must be replaced, but in some situations it is permissible to repair it. This event is quite simple, so the involvement of professionals is not required. The main thing is to strictly follow the instructions and observe safety measures. If the replacement procedure still causes certain difficulties, or there are doubts about the cause of the breakdown, you should contact a service center or use the service of calling a technician to your home.
There are quite a few reasons why the cuff fails. The main task of the owner of the washing machine is to determine them, since we may be talking about more serious breakdowns that require immediate elimination. If measures are not taken in advance, the matter may result in a complete failure of the unit and the need for more expensive repairs.
Particular attention should be paid to the proper operation of the automatic washing machine, i.e. full compliance with the safety instructions and taking into account the recommendations from the manufacturer, which depend on the specific model and can be individual.


