 If washing machine malfunction is not caused by a burnout of the engine, then in the case when the household appliance cannot be restored, the motor can be removed and used for various homemade products. The power of this part is not too great, but the rotation speed can be significant, so additional adjustment of the engine speed of the washing machine is often required. The means by which this indicator can be reduced will be discussed in detail below.
Checking the washing machine motor and determining the assignment of the terminals
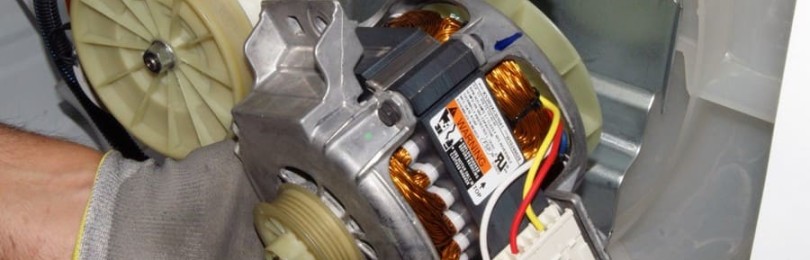
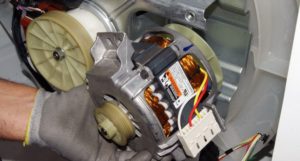
Before assembling the speed controller with your own hands, you need to check the performance of the motor. IN washing machine this part is connected via a terminal block. Typically, the connector has the following electrical terminals:
- 2 wires from the commutator brushes.
- 2 or 3 wires from the stator.
- 2 wires from the tachometer.
If there are 3 wires coming from the stator, then in such a motor it is possible to change the speed by alternately connecting the wires to the current source. Without any additional devices, a motor with two windings can be used in two modes. This feature is explained by the need for higher speeds when operating the washing machine when spinning clothes.
Before connecting the motor to the electrical network, it is recommended to test each winding with a multimeter. The measuring device must be switched to the mode for determining resistance up to 2,000 Ohms and ringing each pair of terminals in turn. If the electrical circuit is not broken, then the multimeter will show a certain value of this parameter, otherwise, the device will not react in any way to connecting the probes to the terminals.
The easiest way
Many power tools that use commutator motors have a small rheostat installed, which can be used to control the rotor speed with virtually no loss of power. Such an element can be removed from a faulty drill, screwdriver or hammer drill and installed in series with an electric motor. If a suitable rheostat is not available, then such a part can be purchased inexpensively at a specialized store.

A small difficulty is that the working stroke of such an adjusting mechanism is very small and can be very difficult to install engine speed at the required level. This problem is usually solved by installing additional mechanical mechanical energy converters.This way, it will be possible to correctly set the rotor speed, as well as ensure that the device is fixed at the required level.
In addition to rheostats from hand-held electric tools, you can use ready-made store-bought devices, which just need to be plugged into an outlet, and the motor leads connected directly to the adjusting device. Such products allow you to change the voltage over a very wide range, so choosing the position of the control toggle switch for certain engine speeds will not be difficult. An important advantage of store-bought rheostats is the ability to use them with other electronic devices, that is, it is enough to purchase a product once, with which you can adjust a large number of devices, not limited to electric motors.
Engine speed controller from Aliexpress

On the back panel of the speed controller there is a cable of wires, in which one pair is “phase” and “zero” and the second pair goes to the tachometer of the electronic engine. If only 2 main wires are connected to the motor from the washing machine through the controller, the motor will operate at maximum speed.In order to be able to regulate the speed, it is necessary to connect the wires coming from the tachometer.
You can connect to such a device not only washing machine motors, but also motors removed from old drills and other unnecessary power tools. The main thing when preparing for work is to correctly install the electrical system. Work on connecting the control device to the engine must be carried out in the following sequence:
- Connect the wires coming from the controller to the motor. It is important not to confuse the purpose of each conductor.
- Plug the device into the network.
- Move the rheostat position to position “0”.
- Press the power button.
- Smoothly move the rheostat to select the optimal rotor rotation mode.
If the speed controller will be used with only one electrical consumer, then after finishing work it is enough to turn off the device on the front panel and also disconnect it from the network.
Many DIYers encounter one problem when connecting a controller of this type. The wires coming from the rheostat are placed in a connector that does not fit into the standard motor socket of most washing machine models. This problem is solved by resoldering a suitable plug block, which can be purchased in specialized stores or removed from the washing machine from which the engine was removed.
Tips and tricks

If all work on connecting and using the speed control device washing machine motor are carried out with your own hands, it is necessary to adhere to the following rules when performing work:
- Connect the motor wires from the washing machine only after the purpose of each wire has been correctly determined.
- Use caution when working with electrical current. All wires through which life-threatening voltage is transmitted must be carefully insulated, and the electric motor housing must be grounded.
- When you turn it on for the first time, it is recommended to use a surge protector with a built-in fuse, which will trip if serious errors are made in the electrical circuit.
- When operating a homemade or store-bought device, there should be no sparks, smoke or excessive heat. Such phenomena may indicate a malfunction of the device or the controller is operating under excessive load.
In general, it will not be difficult to assemble a home-made machine with speed control or any other useful household device with your own hands, of course, provided that all the recommendations outlined in this article are correctly followed.


