The washing machine has long become a common household item. However, any equipment can fail; long-term operation largely depends on the seal. The washing machine seal is an important part, because it ensures tightness. However, with regular washing at high temperatures and poor-quality lubrication, it quickly fails. Fortunately, replacement is easy if you follow the instructions.
What is an oil seal and where is it located?
The oil seal is a ring located between the moving and static parts of the washing machine. Typically the part is made of rubber. This material allows you to make the connection not only tight, but also airtight.
In devices with a front loading type, the oil seal is located on a special bronze bushing. It is mounted on a shaft to which bearings are attached. Through them, the drum and the tank itself are attached to the axle shaft. Moreover, the first one is connected through a special bracket.
This design allows you to wash in different modes. Indeed, thanks to the design, the drum can change the rotation speed.To get to the seal, you will need to completely disassemble the washing machine. The only exception is models with a solid tank made of stainless steel.
What functions does the seal perform in a washing machine 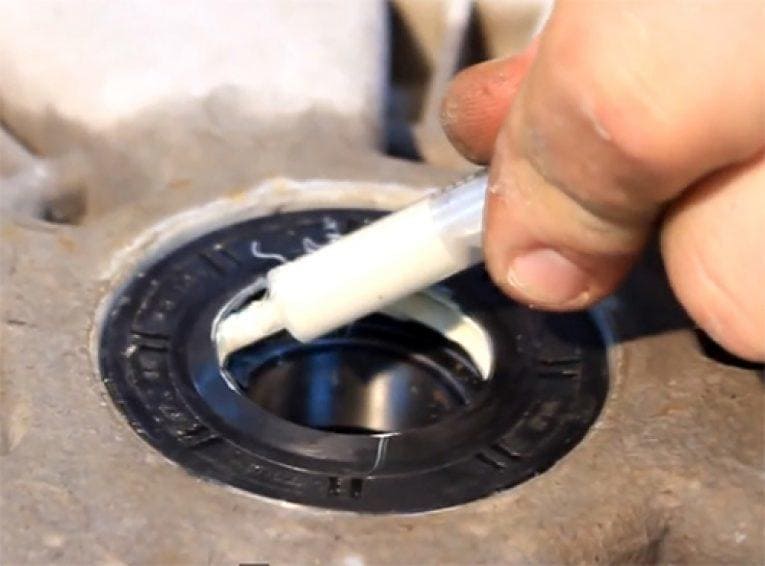
The seal performs a protective function, protecting the internal parts of the device from rust. The drum of the washing machine is located in the tank, in the center of which the bearing is mounted. To prevent moisture from getting on it, a seal is installed on top. The rubber seal closes all the holes through which moisture can leak.
If the seal is not installed, the grease will be washed off the bearing. And this will cause rapid wear due to strong friction. Over time, under the influence of moisture, not only the bearing will be destroyed, but also the shaft. Moreover, a malfunction of the seal can cause a very serious breakdown, which will no longer make sense to fix. After all, repairing a washing machine can result in a price equal to the market value of a new device.
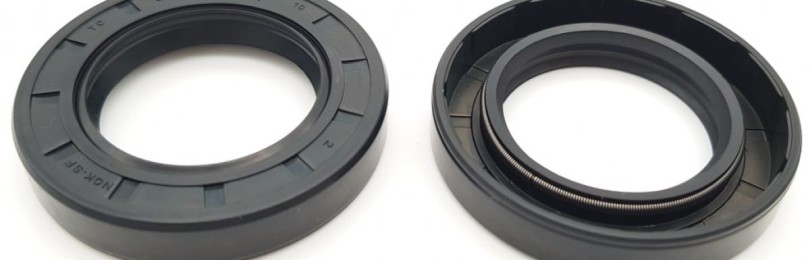
Types and design of seals
Each model requires individual selection, as the seals are very different. Therefore, it is advisable to purchase the part after disassembling the equipment and removing the old part. Table 1 shows the parameters of seals for washing machines of different brands.
| Washing machine brand | |
| Seal type | 25*47*11/13 |
| 30*52*11/13 | |
| 35*62*11/13 | |
| Samsung | 30*52*10 |
| 25*47*10 | |
| «Atlant» | 25*47*8/11,5 |
| 30*52*11/12,5 | |
| 30*52/60*11/15 | |
| Candy | 32*52/78*8/14,8 |
| 40*62/78*8/14,8 | |
| 35*72*10/12 | |
| Bosch Siemens | 40,2*60/105*8/15,5 |
| 22*40*8/11,5 | |
| 40,2*60*8/10,5 |
Electrolux Zanussi AEG
- Seals differ in:
- size (width, internal and external diameter);
profile outlines (they can have from 1 to 3 abutment points, additional edges);
manufacturing method (they are distinguished by reinforced ones with a molded edge or with an edge processed mechanically);
material (fluororubber, silicone, etc.).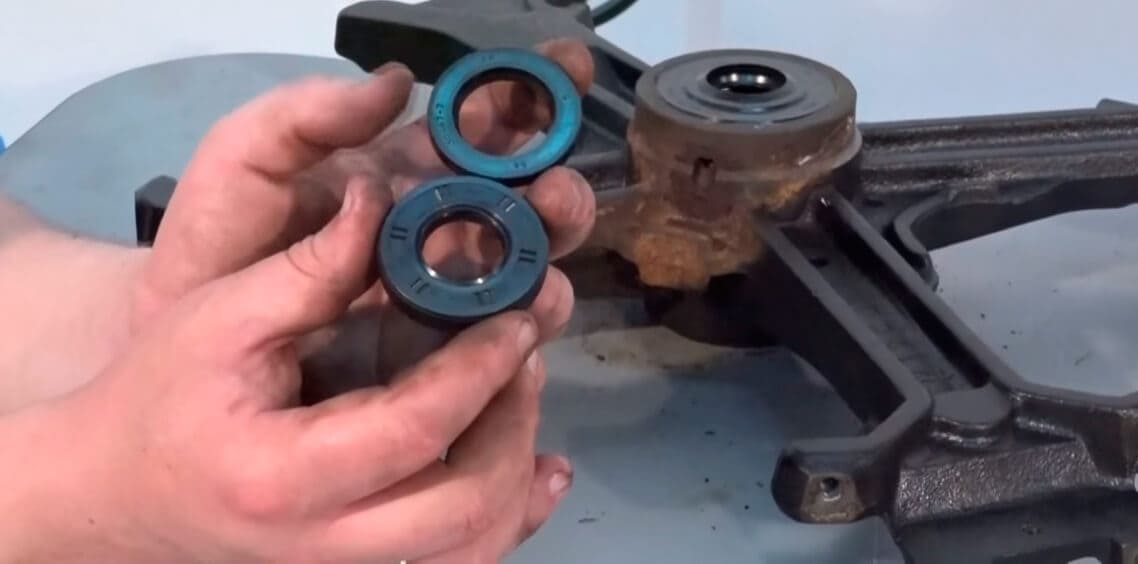
Why does the seal fail?To get to the seal, you will need to completely disassemble the washing machine. The only exception is models with a solid tank made of stainless steel.
What functions does the oil seal perform in a washing machine?
The oil seal performs a protective function, protecting the internal parts of the device from rust. The drum of the washing machine is located in the tank, in the center of which a bearing is mounted. To prevent moisture from getting on it, a seal is installed on top. The rubber seal closes all holes through which moisture can seep.
- If the oil seal is not installed, the grease will be washed off the bearing. And this will cause rapid wear due to strong friction. Over time, under the influence of moisture, not only the bearing, but also the shaft will collapse. Moreover, a malfunction of the oil seal can cause a very serious breakdown, which will no longer make sense to fix. After all, repairing a washing machine can result in a price equal to the market value of a new device.
- Types and design of oil seals
- Each model requires individual selection, since the seals are very different. Therefore, it is advisable to purchase a part after disassembling the equipment and removing the old part. Table 1 shows the parameters of seals for washing machines of different brands.
- Washing machine brand
Oil seal type
Samsung
"Atlant"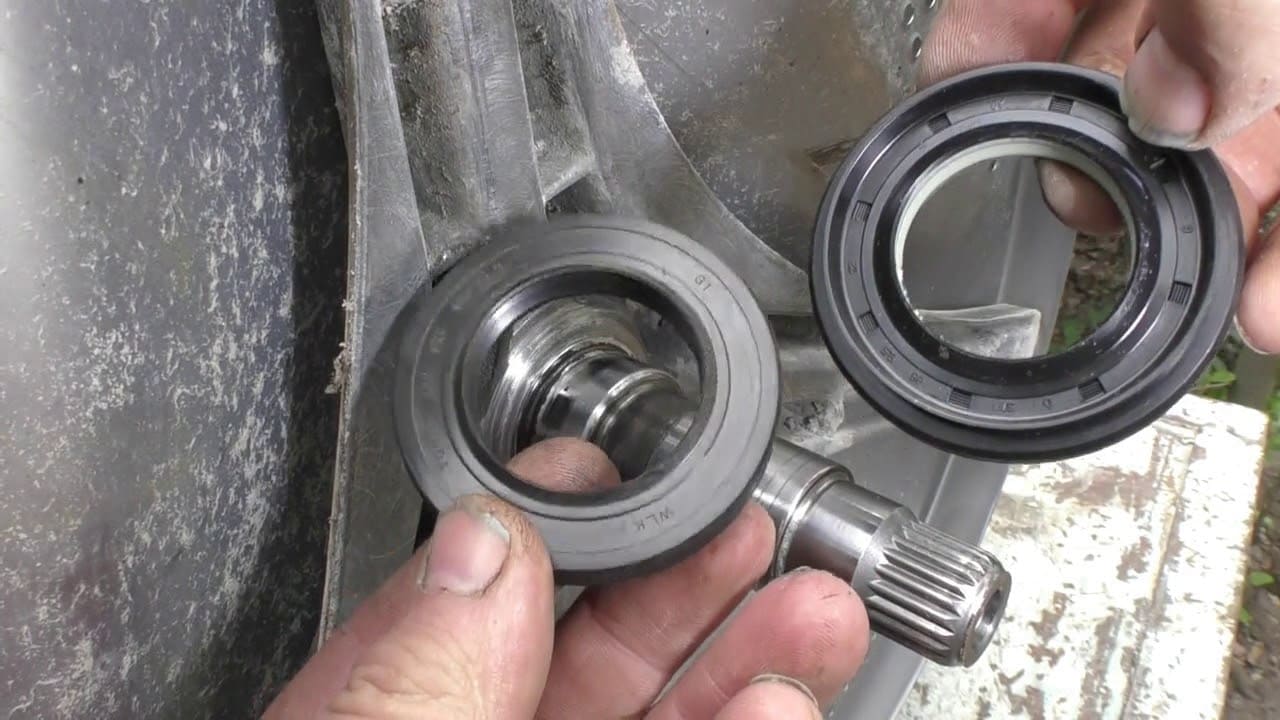
Candy
Bosch Siemens
Electrolux Zanussi AEG
- The seals are different:
- size (width, internal and external diameter);
- profile outlines (they can have from 1 to 3 connection points, additional edges);
- manufacturing method (reinforced with a molded edge or with a mechanically processed edge);
- material (fluororubber, silicone, etc.).
- Why does the oil seal fail?
- The seal is fixed on the shaft, separating it from the drum. The part acts as an intermediary, experiencing constant pressure. Contact of the inner surface of the seal with the rotating shaft provokes abrasion of the rubber. As a result, the part becomes unusable, wearing out from constant friction.
- To avoid this, the part must be periodically lubricated. After all, under the influence of moisture seeping in during the cycle, it is constantly washed out. Left without protective lubrication, the seal dries out and lets soapy liquid through. Water gets directly onto the internal parts, gradually destroying them.
- Symptoms of problems with the seal
- A malfunction of the seal is fraught with more serious breakdowns. After all, rubber, wearing out over time, begins to let liquid through. As a result, metal parts rust from constant exposure to moisture. As a rule, bearings fail, but oxidation can also affect the shaft. Fortunately, the process of rubber abrasion is not fast, so the seal can serve without replacement for a very long time. However, at the first signs of a malfunction, the seal should be replaced.
- The following symptoms will indicate problems with the seal:
creaking and noise when starting the cycle;
play when scrolling the drum;
vibration and knocking during washing, coming from the operating device;
stopping of the drum, rotation becomes inaccessible due to a destroyed bushing.
If there is at least one sign, you need to carry out diagnostics. Timely inspection will help to avoid additional cash injections. If you ignore the symptoms, then the water will also destroy the bearing.
Self-replacement of the seal
To replace the seal, the washing machine will have to be disassembled almost completely.After all, the part is located inside the tank, which has yet to be removed from the body. The disassembly process is labor-intensive, since the washing machine device includes many different parts. In order not to get confused in them, it is necessary to record all stages. You can use photography and video for this. Another option is to describe everything in detail on paper, making schematic sketches and brief explanations.
If you are planning to disassemble the device, you should not purchase a seal in advance. You can make a mistake with the type of part, because manufacturers use seals of different diameters. Therefore, it is better to remove the oil seal at the first stage. Make your purchase based on the type and size of the old seal. Having received a part of a suitable diameter, assembly can be carried out.
The disassembly process should not cause difficulties; it can be easily carried out using a standard set of tools. Problems may arise due to the type of tank, which can be split or solid. In the second case, it will have to be sawed to get to the faulty part. This requires experience and dexterity, so inexperienced users should entrust this task to specialists.
Replacing the oil seal includes the following steps:
Ensuring work safety. Before any manipulations, the equipment must be disconnected from the power supply. The water supply also needs to be shut off until disassembly.
Removing the top panel. The fastening parts for all internal parts are hidden under the cover. To detach the top, you need to pry it off using a special protrusion. It is located on the back; dismantling is best done using a medium-sized screwdriver.
- Removing the front and rear panels. To dismantle, you need to unscrew the bolts located under the top cover.
- Disconnecting the drive belt.It is easier to do this by simultaneously moving the shaft and removing the part.
- Removing the cuff separating the drum from the tank. It surrounds the hatch; to remove the part, just pry off the metal ring. It holds the cuff in place, but the rim is easy to pry off with a screwdriver.
- Disconnecting contacts from the heater and motor. To remove the heating element, you need to twist the central nut and press the bolt inward. Dismantling the heating element is not necessary, but this will protect the part from possible damage. You can remove the engine from the housing after removing the mounting bolts.
Disconnecting all hoses and pipes going to the tank.
Removing the water intake sensor.
Dismantling the upper and lower counterweights located inside the housing.
Removing the shock absorbers and springs supporting the drum.
- Removing and disassembling the tank. After dismantling, you need to unscrew the screws and open the latches. Then, using a hexagon, you need to unscrew the pulley.
- Now, after disassembling the tank, it is necessary to inspect the internal parts: the shaft and the cross. If the oil seal is worn out, these parts are the first to suffer. Chips, cracks or scuffs will indicate the need for replacement. After all, damaged parts will not be able to ensure normal operation of the washing machine.
- After disassembly, access to the oil seal, bushing and bearings will open. The process of removing a worn part is simple: just pry it off with a screwdriver. Another option is to knock out the bearing along with the seal using a chisel and hammer.
After removing the old seal, you need to thoroughly clean the place where it is installed. To do this, use an alcohol solution; before installing the new part, everything is thoroughly lubricated. The oil seal must be installed based on the factory marks.
If they are not there, then you need to mount the part as tightly as possible. It should tightly cover the bearing surface. After this, you need to reassemble in reverse order. It’s easy to check the success of the repair; just test run the washing machine.
It is better to start the device without underwear - this will allow you to get a complete picture of the condition of the device. During operation, you need to pay attention to the presence of extraneous sounds. The absence of loud knocks or strong crackling sounds will indicate the success of the repair work.


