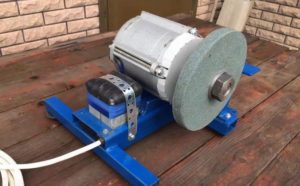
 If you need a grinding machine in your home workshop, you don't have to buy one. You can assemble a grinder with your own hands from a washing machine engine. Its advantage is that it allows you to process not only small parts, but also the ends of products. To make such a device, you will need an old washing machine, tools, a manual for assembling a grinder, and free time.
Using a grinder
Area of use of the grinder – processing of parts at the final stage to remove roughness. This operation is carried out before painting or varnishing. In addition, a grinding machine allows you to quickly and effectively eliminate defects or imperfections on surfaces. Thanks to belts with different grain sizes, this grinder can be used to process wooden or steel products, as well as non-ferrous metals. A homemade grinder made from an old washing machine engine allows you to grind parts of a wide variety of shapes and designs, which is unattainable when processing with hand tools. These can be triangular, flat or round objects, etc.
Necessary materials for making a grinder
To make a simple grinder from a washing machine engine, the following materials are needed:
- washing machine motor;
- starting capacitor from the engine;
- legs and body panels of the washing machine;
- plywood sheet;
- a 5 cm piece of pipe with thick walls and an internal diameter of 1.4 cm;
- 2 bearings of the same size;
- glass sealant;
- sheet of metal with a cross section of 0.8 cm;
- corner 6.3x6.3 cm;
- profile pipes 4x4 cm and 3x3 cm;
- extended nut;
- a strip of steel with a cross section of 1 cm;
- gas shock absorber for furniture;
- power switch;
- plastic plugs 3x3 and 4x4 cm;
- bolts and nuts M12, M10, M5, M6.
The procedure for making a homemade grinder
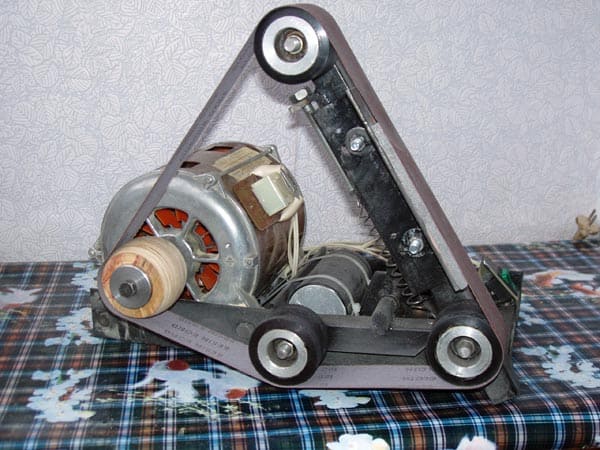
The process of making a grinder with your own hands occurs in the following order:
- First you need to make tension rollers from moisture-resistant plywood. Thickness doesn't matter.
- Using a drill with a wood bit, make 9 plywood blocks with a diameter of 10.2 cm for the drive roller. The number of circles may vary depending on the thickness of the plywood sheet and the width of the sanding belt used.
- Sand the pancakes to remove unevenness, chips and roughness, spread with PVA glue and glue, forming a wide roller consisting of many layers. To ensure a strong connection, place the part under the press.
- Make a driven roller. Use a 6.4 cm crown. Cut 9 pancakes, sand and glue.
- To prevent the parts from delaminating, after the glue has dried, drill 2 holes in them on the sides and fasten them with screws (2 pieces on both sides).
- Using a lathe, balance the rollers, remove any irregularities and make them smooth.
- Make an adapter for attaching the drive roller to the motor shaft from a piece of pipe. A piece with an internal diameter of 1.4 cm is used.
- To press the tube onto the motor shaft, drill a hole and make an M5 thread.
- Weld an M12 bolt on the opposite end of the tube.
- Expand the drive roller hole to half the depth for installing the tube. The remaining narrow part contains the thread from the M12 bolt.
- Place a bearing on both sides of the driven roller. The size does not matter, only the inner diameter must match. The nests for planting them are made on a lathe.
- Coat the parts with glass glue to achieve greater smoothness.
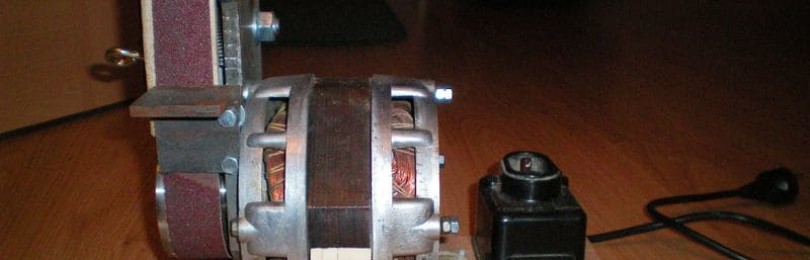
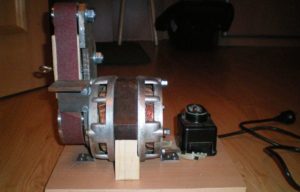
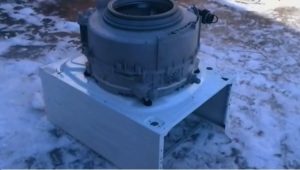
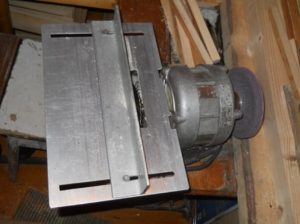
- Build a frame to accommodate the future mini-grinder. To do this, you need to take a sheet of metal 8 mm thick and cut a rectangle 22x31 cm.
- To secure the motor from the washing machine, take two corners 1.3 cm long.
- Place a steel plate, install an angle and a motor, make markings for holes for fasteners with a diameter of 6 mm.
- If you take the metal next to the shaft, the angle will not interfere with the bolt securing the drive roller. It is most convenient to cut out a small triangle.
- Use four M6 nuts to secure the corners to the washing machine motor.

- Install the engine with the corners on a metal sheet, make markings and weld the corners to the base of the future grinder.
- Cut a piece 30 cm long from a piece of 4x4 cm profile. Cut the same piece from a 3x3 cm profile.
- Now you need to make a mechanism for adjusting the tape. To do this, you will need an elongated nut on which the edges are ground.
- It needs to be welded to a strip of steel 1 cm thick, then a hole with an M10 thread must be drilled in the strip. It is designed for a bolt with a driven roller attached.
- Make an L-shaped part from a piece of a 3x3 cm square pipe and attach nuts by welding to secure the steel strip.
- On the perpendicular side of the square, weld a nut with a bolt opposite the head of the bolt with the driven roller installed.To adjust the grinder and change the angle of the roller, you just need to unscrew or screw in a short bolt.
- Weld a 4x4 cm profile pipe vertically onto the base of the grinder. In this case, it must be taken into account that the driven roller must be opposite the drive roller mounted on the motor shaft.
- To ensure that the tape is tensioned smoothly, a gas shock absorber for furniture is installed. It is located between the 4x4 profile and the L-shaped 3x3 roller clamp.
- The support for the grinder is assembled from a piece of 4x4 profile and a 63rd angle. To increase the welding area, a cutout is made on the pipe. The angle is secured with bolts because it will be removed periodically during maintenance.
- To make a table for processed workpieces, a sheet of metal 8 mm thick is used. The width of the grinder table is 8 cm.
- To build a support for the grinder table, you need to take a 4x4 pipe 12 cm long. A hole is drilled in it, the end is sharpened in a semicircle and an M10 thread is cut. Then loops are made and welded to the grinder table.
- The sole of the grinder has a thread for 4 legs that reduce vibration. They are removed from the washing machine body. From it you need to cut a sheet of metal 13 cm wide to make a protective casing.
- Bend the metal sheet for the casing in a vice and make mounting holes in it to form a real protective casing.
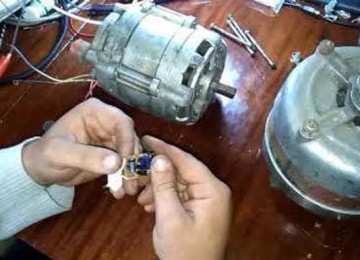
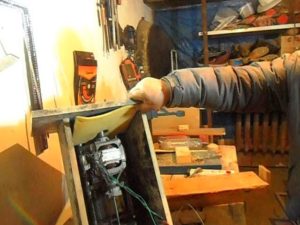
After the parts have dried, they need to be assembled. The most difficult thing is to mount the power button, capacitor and solder the wires. If there are plastic plugs, you can install them on a 3x3 and 4x4 cm profile.
The washing machine engine has enough power to operate the grinder properly. The gas shock absorber allows you to use sandpaper belts of different lengths. This means that you can use factory consumables instead of making your own sanding belt.
Conclusion
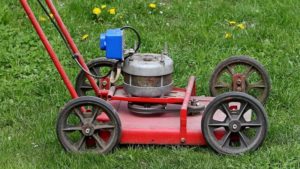
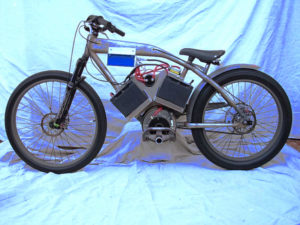
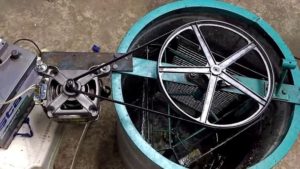
You can assemble many useful devices from the engine and body of an old washing machine: juicer , grain crusher , barbecue , smokehouse , wax melter , feather plucking machine , sandpaper, wind generator and grinder. Such a grinding machine will be useful in any household. To make it, you will need a number of additional parts, as well as free time and a number of expended efforts, as well as a step-by-step guide. The final result is very good and worth all the costs and efforts. In addition, from a used washing machine you can also construct:
a lawn mower
- a grass cutter, ,
- an electric bicycle,

- a honey extractor,
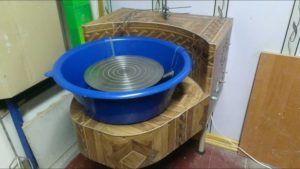
- a potter's wheel,
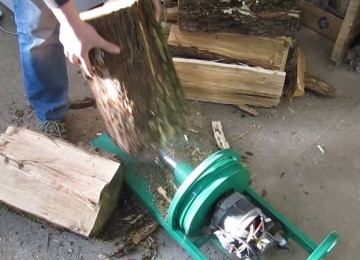
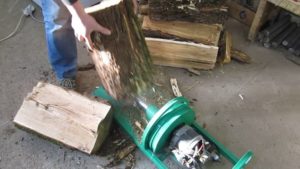
- a wood splitter,
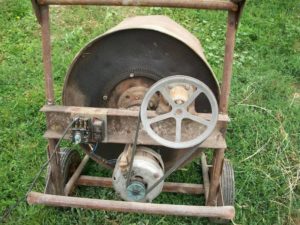
- a concrete mixer,
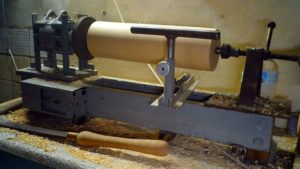
- a lathe,
- a juicer,
- a smokehouse,


- a circular saw
- and much more. similar entries from this section
- Choosing and installing inlet hoses: key points for long-term operation of the washing machine