 A washing machine is considered an indispensable assistant for any housewife. For this reason, repairing it when it breaks is considered an urgent matter; it does not tolerate relationships of a superficial nature. But there is one problem - the services of a specialist are expensive, and it is sometimes difficult to find an experienced specialist. You can do it on your own, especially for those who are quite familiar with the features of their SMA and have all the necessary tools. It is quite difficult for a beginner to remove this important detail, because proper skill is needed in this matter. So, how to remove a bearing from a washing machine drum? It is recommended to study the theory first, and only then get down to business.
Main reasons for replacement
With the help of this element, the shaft is fixed and the uniformity of its rotational movements is created. Such a compact part absorbs all load forces on its body.
The reason for the failure of this element may be old seals that have lost their tightness and allow water to pass through. Due to long-term use, the lubricant has been washed away, corrosion has begun to form, and the bearing is wearing out.
It is no secret that many users put laundry items into the machine drum, guided by the rule “how much will fit.” Such actions are considered incorrect, because constant overloads cause wear of parts, which include the bearing. This is evidenced by an unpleasant grinding noise that appears during spinning or manually turning the drum.
Another sign of a problem situation is the appearance of a leak. If you find water accumulation under the bottom of the machine, check the bearings.
Failure to solve the problem in a timely manner may cause damage to the tank, wear of the crosspiece and the shaft itself. Such problems relate to major repairs; sometimes it is necessary to change not only the tank, but also the drum of the machine.
Professional opinion
On average, the service life of a bearing lasts from six to eight years. Many experts argue that it needs to be changed every five years or simply add new lubricant. It is best when such work is entrusted to experienced craftsmen who perform everything quickly and efficiently.
Getting ready to carry out repair work
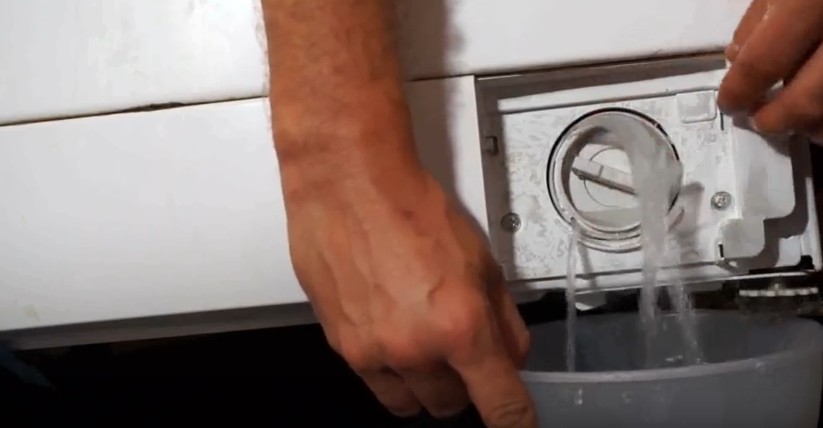
First of all, if there is any water left in the machine, it must be completely drained, because the washing machine will have to be completely disassembled. To do this, perform the following steps:
- the washing machine is de-energized from the electrical network;
- All communications are disconnected (water supply and drainage to the sewer). The remaining water in it is drained from the water intake hose;
- the same actions are performed with the drain filter located under the front cover and hidden by a small hatch or panel base. Using a screwdriver to open the latches, open the panel, unscrew the filter, and drain the water.
We move the machine into as much free space as possible. All that remains is to prepare the tools that will be needed when removing the bearing. The list looks like this:
- screwdrivers of slotted and Phillips types. There is a possibility that the hexagonal version will also come in handy;
- wrenches and socket wrenches included in the set;
- pliers;
- removable device. You will have to purchase it. But first you should make sure that the bearing requires replacement. Otherwise, it is recommended to buy a universal option, with which elements of any size will be dismantled;
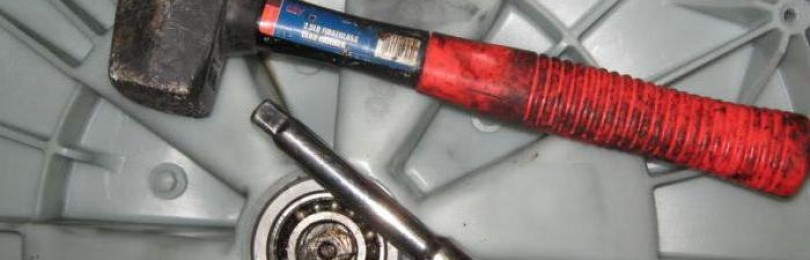
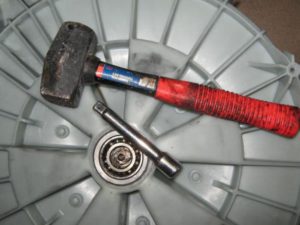
- hammer with chisel;
- bolt;
- hacksaw with blade for metal;
- sealant.
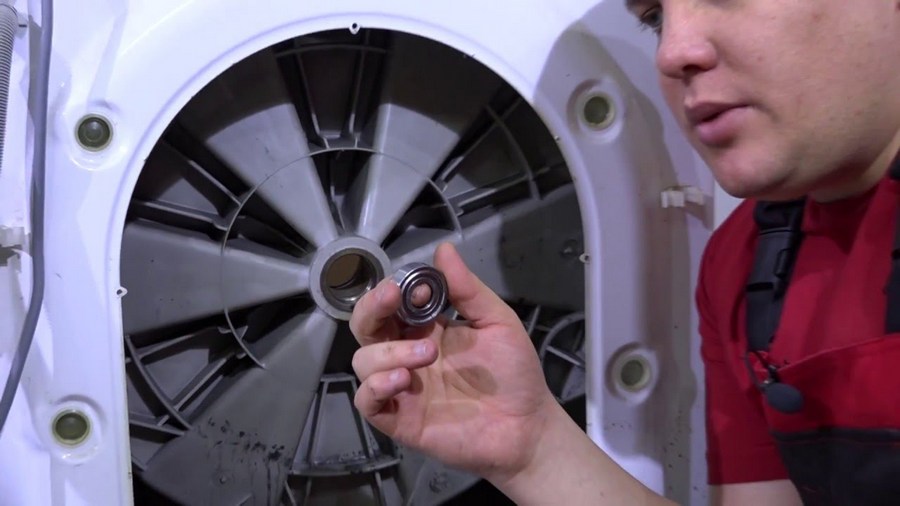
Naturally, you will have to buy a new bearing. It may be a hub version or another suitable for your washing machine. It is possible to clarify the markings and serial number after dismantling the element that has lost its functionality.
Instructions for dismantling the tank
To remove the drum, you will have to disassemble the body of the washing machine. We will act in a certain sequence:
- We provide access to the machine;
- remove the panel from above, for which we unscrew a couple of bolts from the back using a screwdriver;
- remove the tray for washing powders;
- unscrew the bolt located under the receiving tray;
- remove the bottom of the body located at the front;
- we unscrew more bolts that appear before our eyes;
- remove the clamp from the door, remove the rubber seal from the body part;
- release the hatch lock and disconnect the front hull part;
- We begin to unscrew the back panel;
- remove the drive belt;
- we find the wiring to the water heating element and disconnect it;
- disconnect the pipe connecting the pump and the tank;
- remove counterweight elements;
- unscrew the bolts securing the electric motor and remove it;
- we remove the shock-absorbing devices and springs on which the tank is supported;
- we take out the tank.
Remember that the job of removing the tank is quite complex.
We remove the bearing together
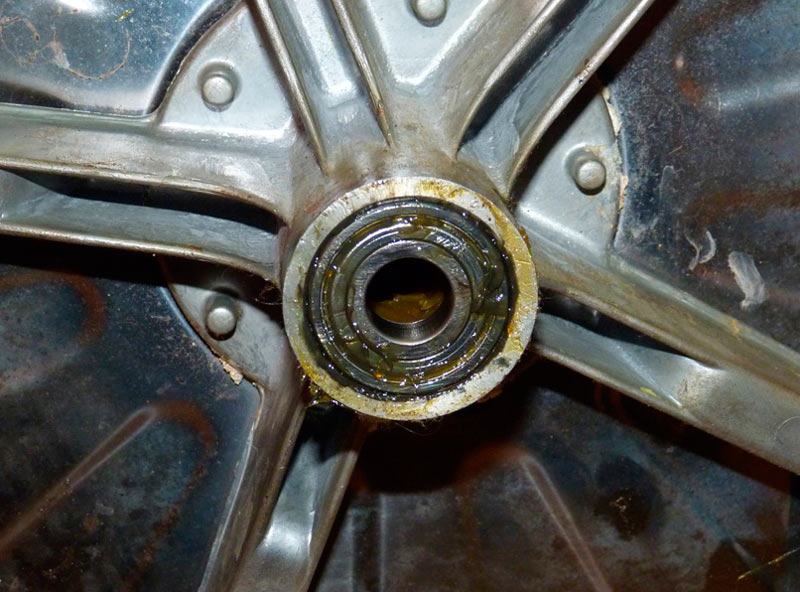
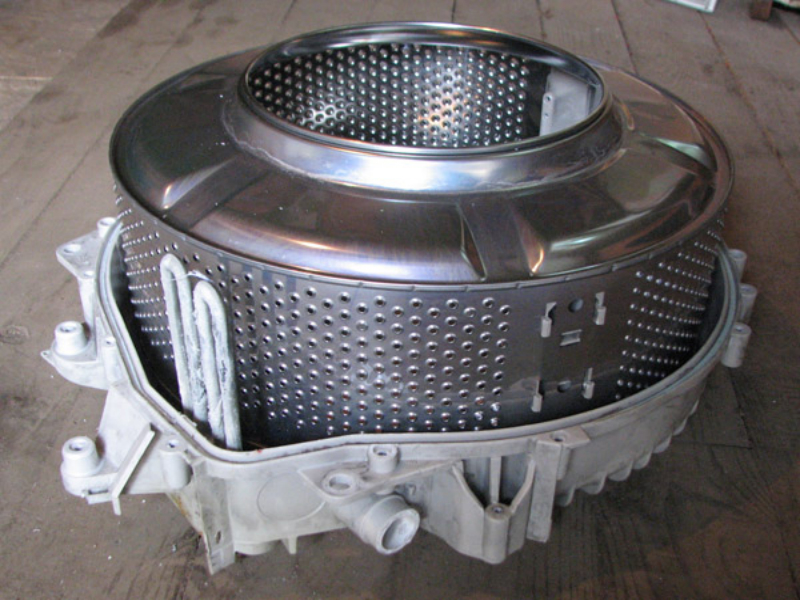
After removing the tank, we disassemble it and remove the bearing. If there are traces of grease on the drum cover, then the need to replace the seals and bearings is only confirmed.
Structurally, the tank consists of two parts, which are connected to each other using bolts or glue. In the case of the second connection option, it is carefully sawn. Experts say that in terms of disassembly it is easier to deal with bolts. When the tank decomposes into two separate elements, you can proceed to the following steps:
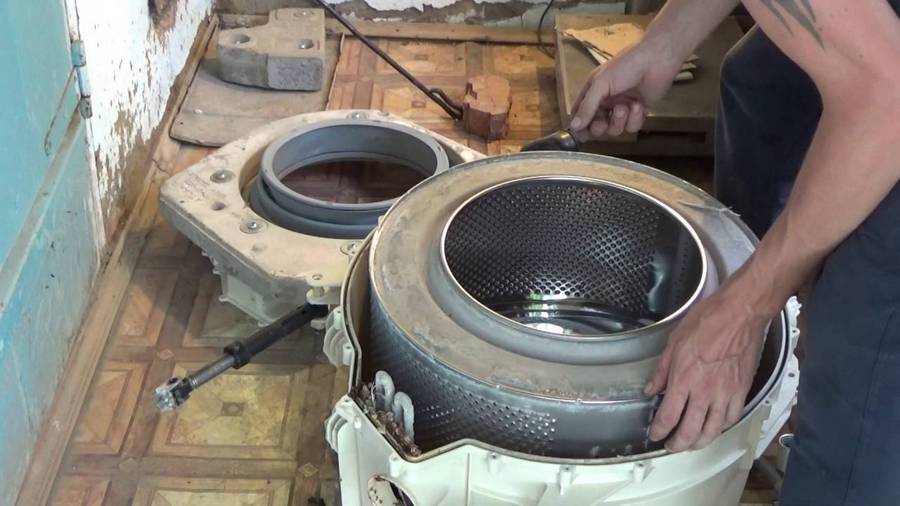
- We unscrew the drum pulley using a special star-shaped wrench or armed with a hammer and chisel. It is worth noting that the bolt is difficult to give in, the tool must be of high quality and reliable, the actions must be careful so as not to damage the thread;
- loosening the pulley a little, we remove it from the drum screw, and a bearing appears before our eyes;
- The drum shaft is knocked inward, which allows you to separate the washing machine tank from the drum. Before this, you can replace the original shaft with an old one to protect it from damage;
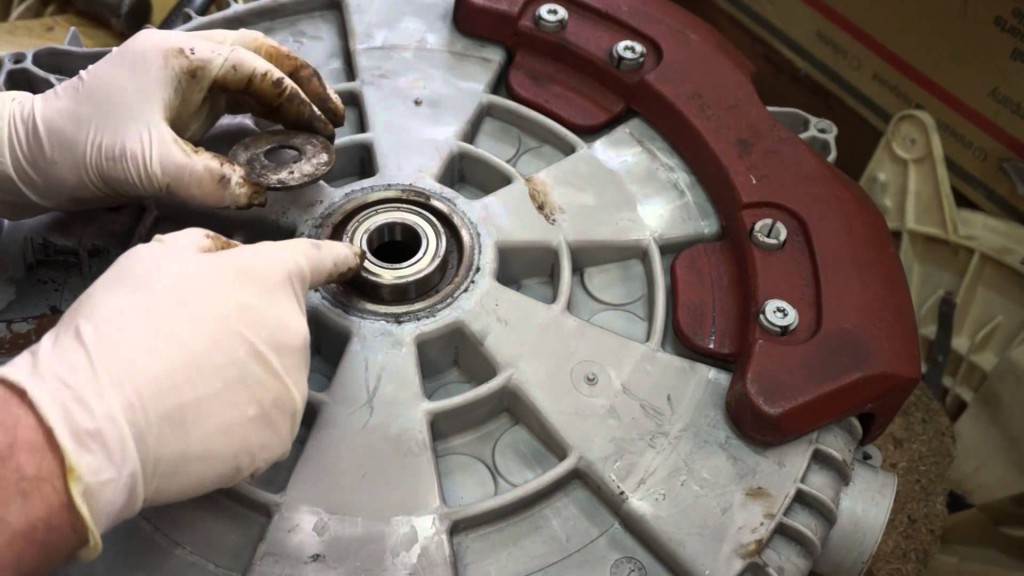
- bearings are placed on the internal and external sides. We insert a metal rod under the bearing race and begin to knock it out with a hammer, moving in a circle. If you have a special puller, you can use it.
With the help of such a device, the bearing can be dismantled quickly and the race will not be damaged.This is very important when the bearing is functional and the shaft needs to be replaced. The shape of the puller may vary. It is most convenient to work with a model with legs, which, in the process of tightening the element, exert a load effect only on its inner cage, with virtually no effect on the outer one.
As a rule, the small bearing is dismantled first, followed by the second, larger one. Before dismantling the bearing, remove the seals, which are also recommended to be replaced with new analogues.
The work is done, all that remains is to install new components and reassemble the washing machine, proceeding in the reverse order. When installing new components, do not forget to lubricate them thoroughly to ensure protection from moisture. In addition, the lubricating layer will reduce the percentage of friction of parts, increasing their service life. A new gasket is put on parts of the tank, and sealant is applied over the entire surface. The pulley is inserted and secured with a key.
Washing machines in which the base of the tank is made of stainless steel are much easier to repair. In these modifications, the bearing is located in the crosspiece or rear element of the tank, which is very easy to remove.
The main mistakes that occur during the process of disassembling the AGR and replacing the bearing
Professionals highlight a list of the most common erroneous actions made by beginners who do not know how to properly remove a bearing in a machine. They entail serious consequences, causing major repairs of the unit or its complete failure.
Here is a list of such violations:
- the wiring of the sensor blocking the door breaks when dismantling the front panel of the washing machine;
- when removing the pulley, significant damage is caused to it;
- the threads in stuck bolted joints are broken;
- the water fill pipe breaks off;
- In the process of knocking out the bearing, the drum is damaged, which sometimes has to be replaced.
We recommend that you pay attention to these situations and try to avoid such violations.
It is possible to replace the bearing on your machine yourself. You just need to weigh your strengths and experience, because there is a possibility of serious breakdowns.
SMA repair at home
Is it possible to replace the bearing on site, or will I have to take the machine to a service center? The technician will be able to repair the machine at home, and it won’t take much time. As soon as the problem is identified, the specialist will begin to “reanimate” the unit immediately.
As a rule, one visit by a technician with the appropriate level of qualification is enough for a complete repair. He will have all the necessary elements, and you can verify their originality yourself.
Having completed the repair work, the specialist will turn on the unit and check it in all modes.
It will take an experienced technician several hours to find the problem and fix it. He will demonstrate the correct operation of the washing machine, characterize your incorrect actions that caused the breakdown, and advise how to handle the machine in the future. Calling a specialist to your home is the right and very profitable decision. Arriving at your home and diagnosing the problem will be done free of charge. All work and cost of parts are at fixed prices.
You can not only save your time, but also financial resources.In addition, after the repair you will be issued a warranty card for the services provided.
Is it worth replacing?
When the initial signs of bearing failure begin to appear, it is necessary to immediately take all measures to carry out repair measures. Continued use of the washer can cause significant failures associated with deformation of the crosspiece, the replacement of which costs a tidy sum. If water begins to leak due to a breakdown, then there is a possibility that the water heating element will burn out. It is likely that in this case you will have to say goodbye to the electronics system of the washing unit. This means that it will be cheaper to purchase a new device.
If a bearing fails, there is no need to sound the alarm - there is no reason to worry about upcoming expenses. Even the service center will charge you around 2,000 rubles for such repairs. And if you sat down to do all the work on your own, then the costs will turn out to be completely insignificant.
Conclusion
Before installing new bearings, the bushing, shaft and spider must be checked. When the washing machine was used for a long time with an element that had lost its functionality, play could appear and cracks could form on the crosspiece itself. There have been cases where the shaft broke so that even new seals could not hold water.
If no obvious problem signs are identified, it is recommended to clean the components from scale and dirt deposits. The parts are brought to a perfectly smooth state and checked once again for serviceability.
In addition, it is necessary to remember that washing machines from different manufacturers differ in certain nuances in design and repair.Therefore, it is recommended to carefully study the operating and repair instructions for your laundry washing machine, take into account all its features and act carefully.
If you have the slightest doubt about your own abilities, call an experienced specialist. Only a specialist will be able to accurately identify the problem and fix it with minimal losses.


