 Even with the most careful use of the Indesit washing machine, many people eventually face the problem of replacing the bearing. Such a breakdown cannot be ignored as it is serious and can lead to a complete breakdown of the machine.
It is not recommended to start repairs yourself if you do not have confidence in your own knowledge and skills. However, for someone experienced in the field of equipment repair, replacing bearings will not be a very difficult task.
Having the necessary tools and following the operating technology, it is quite possible to replace the bearing in an Indesit washing machine at home.
Diagnosis of failure
It is necessary to first check and find out whether the washing machine needs replacing bearings.
To identify malfunctions, you can rely on the main symptoms:
- The machine makes a louder noise than usual when spinning;
- During manual rotation, the drum begins to beat.
It is important to take into account that the machine can make noise for various reasons, and before diagnosing a malfunction in the bearing system, it is necessary to exclude factors such as foreign objects getting inside the device, and also make sure that the water intake and drainage system is working properly.
Preparation for repair
TO replacing a bearing on a washing machine need to prepare. It is necessary to purchase bearings and seals for the Indesit machine from original production in advance. It is important to purchase the original, as this guarantees that they will fit the specific model of washing machine.
Why shouldn’t you limit yourself solely to purchasing bearings? The purchase of oil seals is due to the fact that their replacement is necessary when repairing bearings, which often break directly due to broken oil seals. The failure of one part inevitably entails the failure of others.
Also, repairing a washing machine is impossible without a standard set of tools, which is probably available in every home.
You will need:
- Phillips screwdrivers with long and short shafts;
- small hammer;
- block of wood;
- set of sockets and open-end wrenches;
- hex wrench;
- WD-40 preparation;
- chisel;
- pliers.
Step-by-step repair guide
After accurately determining the failure of the bearings, you can begin to repair the washing machine. The repair includes several steps, which are described below.
Dismantling the elements of the washing machine
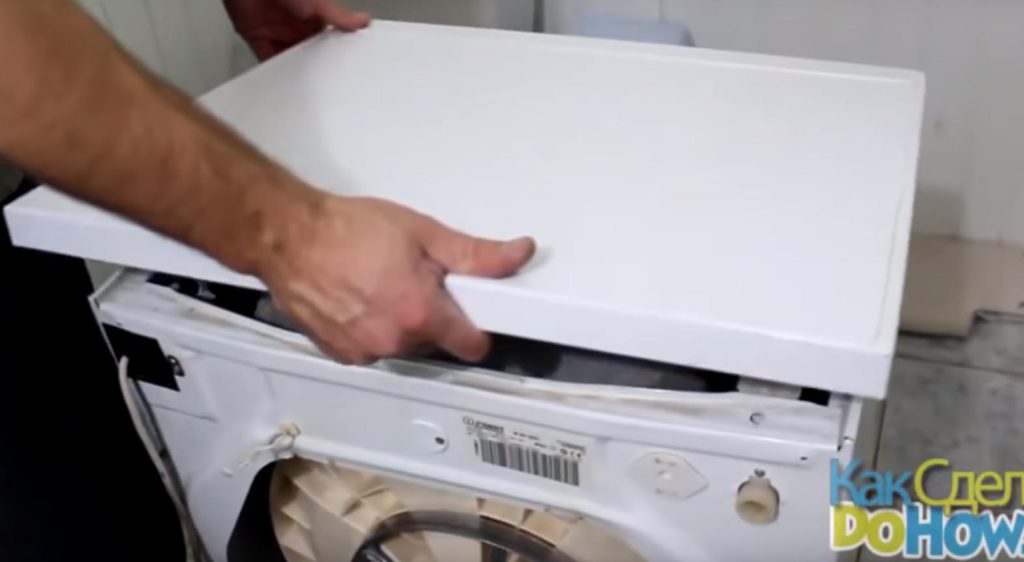
Necessary turn off the device from the power supply and turn off the tap. This will not only allow you to change the bearings, but also clean the water filter, which can be pulled out by removing the water supply hose. Then you need to carefully remove both panels of the washing machine without damaging the rubber seals. First of all, the top cover, which is secured with bolts, is dismantled.
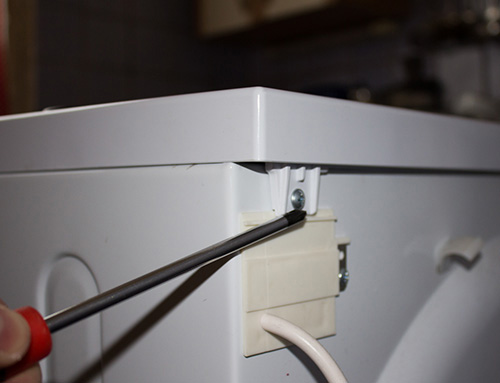
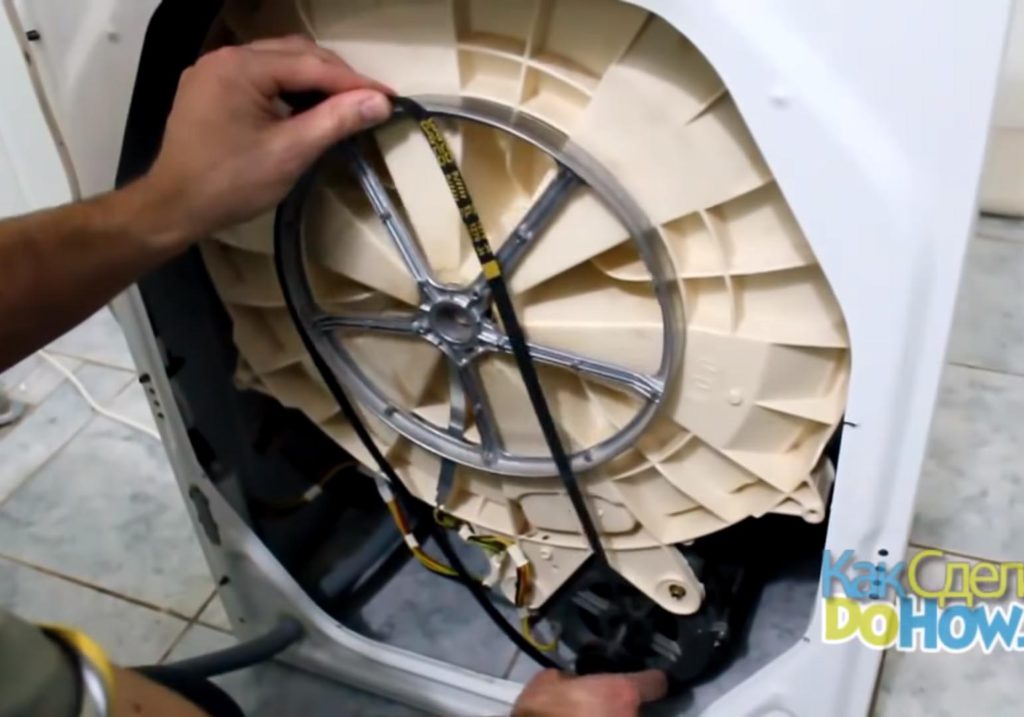
After which you need to turn the back of the washing mashine towards you and unscrew all the screws in a circle. This way you can remove the back panel and gain access to the plastic tank that houses the drum. In addition, under the back cover there is a pulley, motor and drive belt.
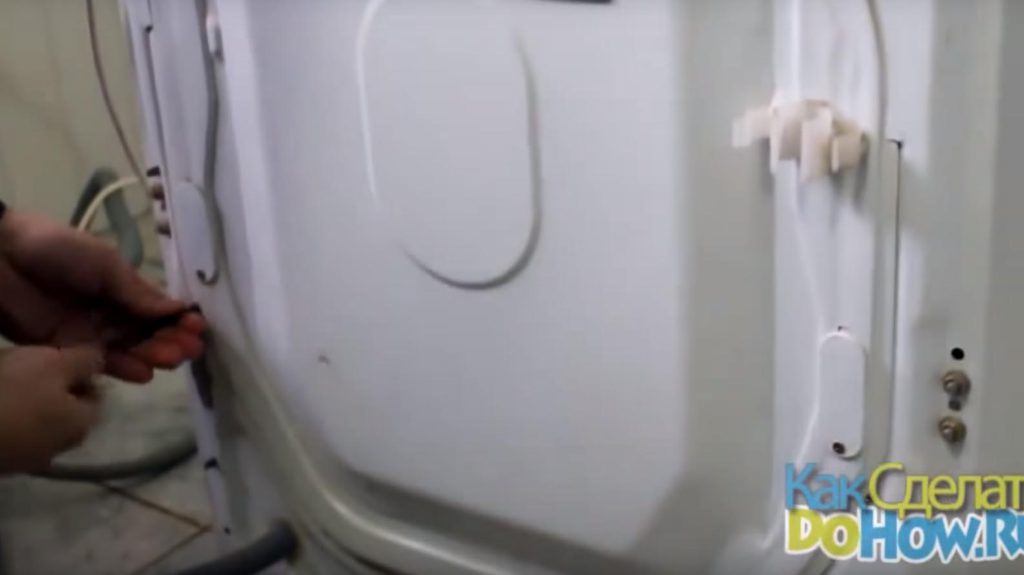
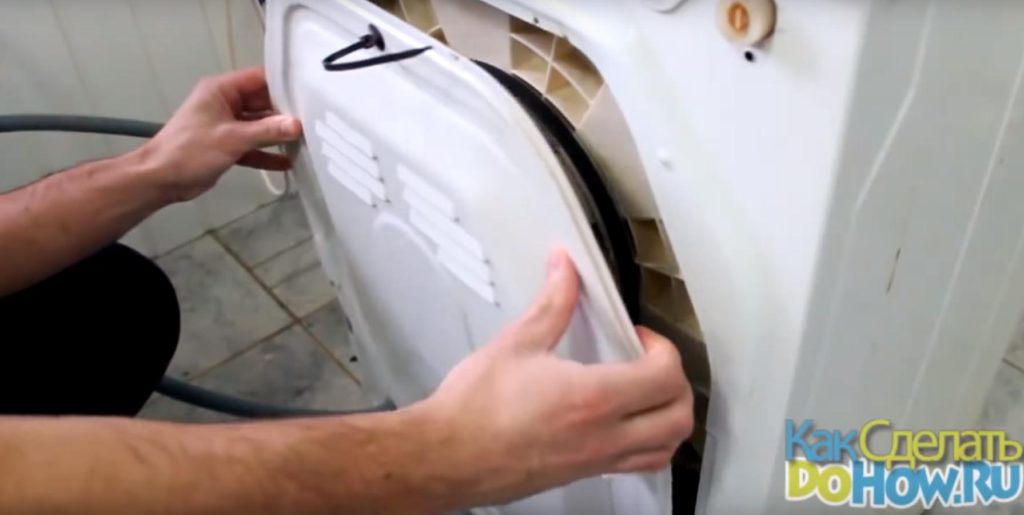
The front wall is somewhat more difficult to remove and dismantling takes place in several stages:
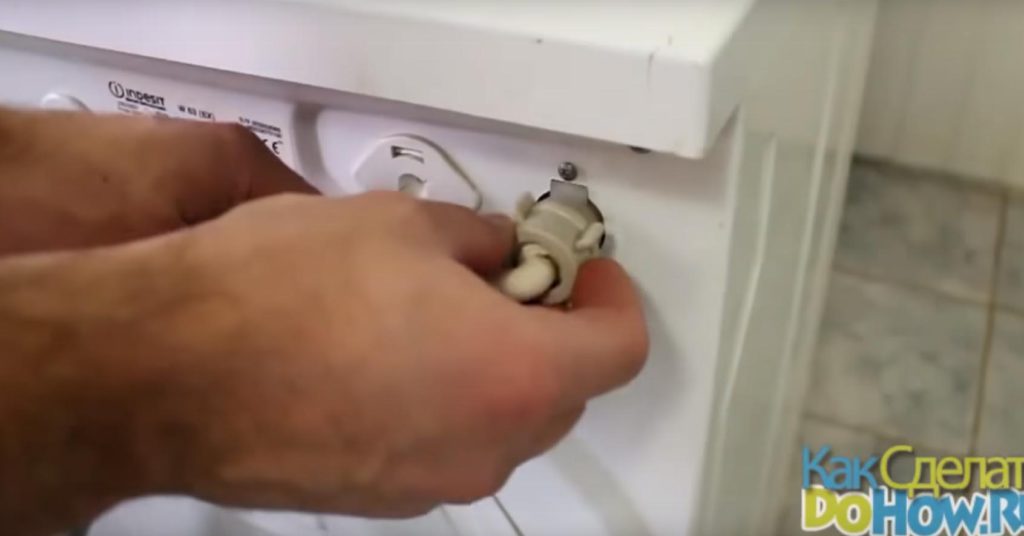
- To begin with, remove the powder cuvette, which is removed by pulling it out all the way and lifting it up;
- After removing the cuvette, access to the screws that hold the front panel of the washing machine is available. They need to be unscrewed;
- You need to remove the rubber cuff and unscrew the bolts that hold the hatch locking element. After this, you can remove the front panel of the machine.
As a result of these manipulations, access to the internal structure of the washing machine becomes open and replacement of bearings and seals will take place without difficulty.
Removing the pulley and motor
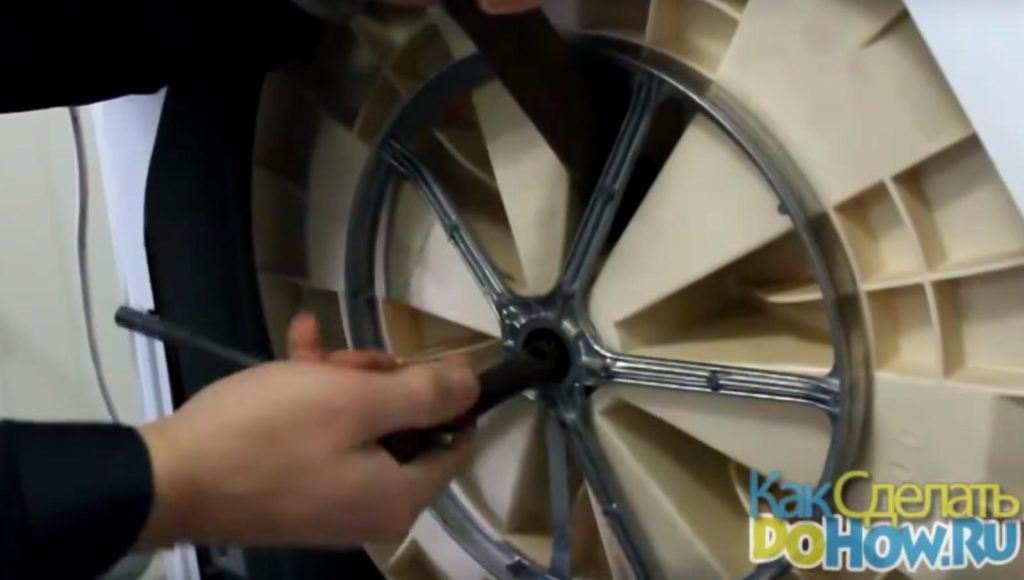
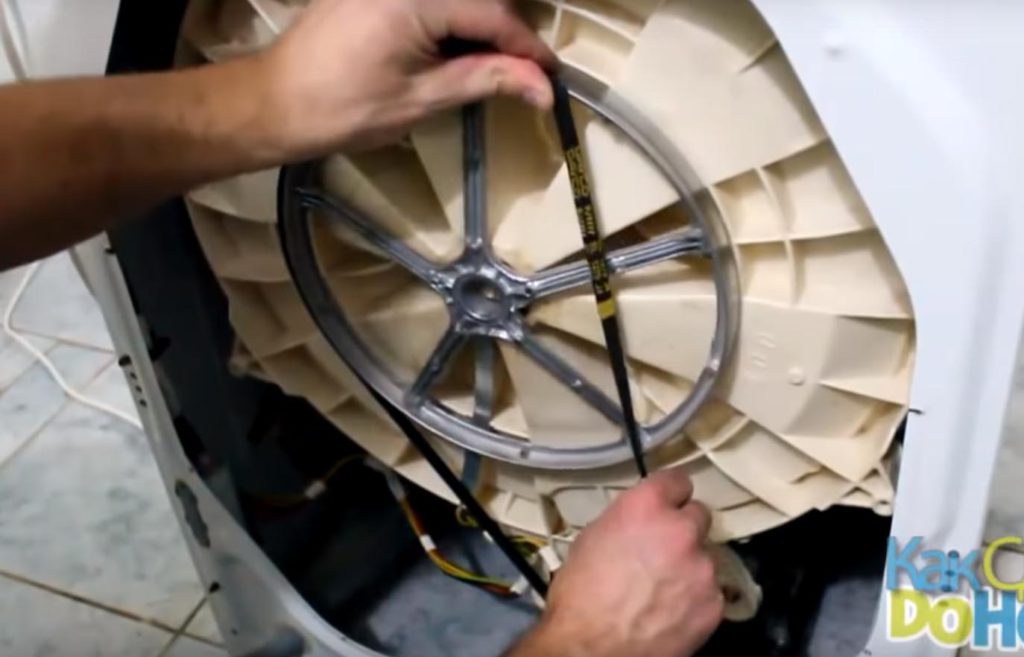
- First you need to remove the belts from the drum pulley and the motor drive. This will allow you to firmly secure the pulley with a wooden block placed in it and unscrew the main retaining element of the pulley fastener;
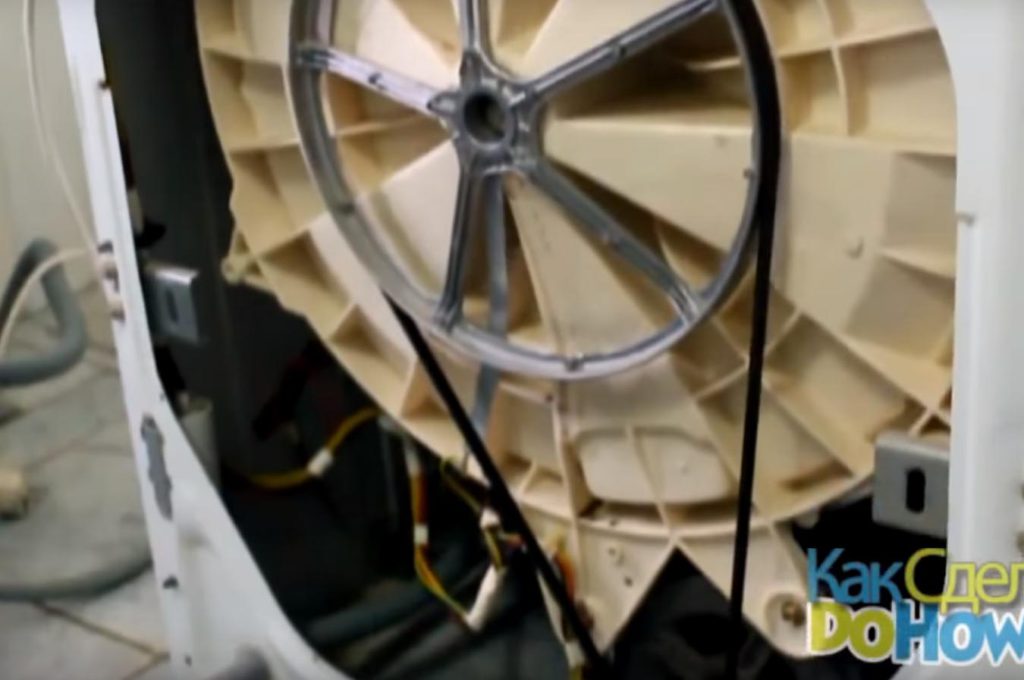
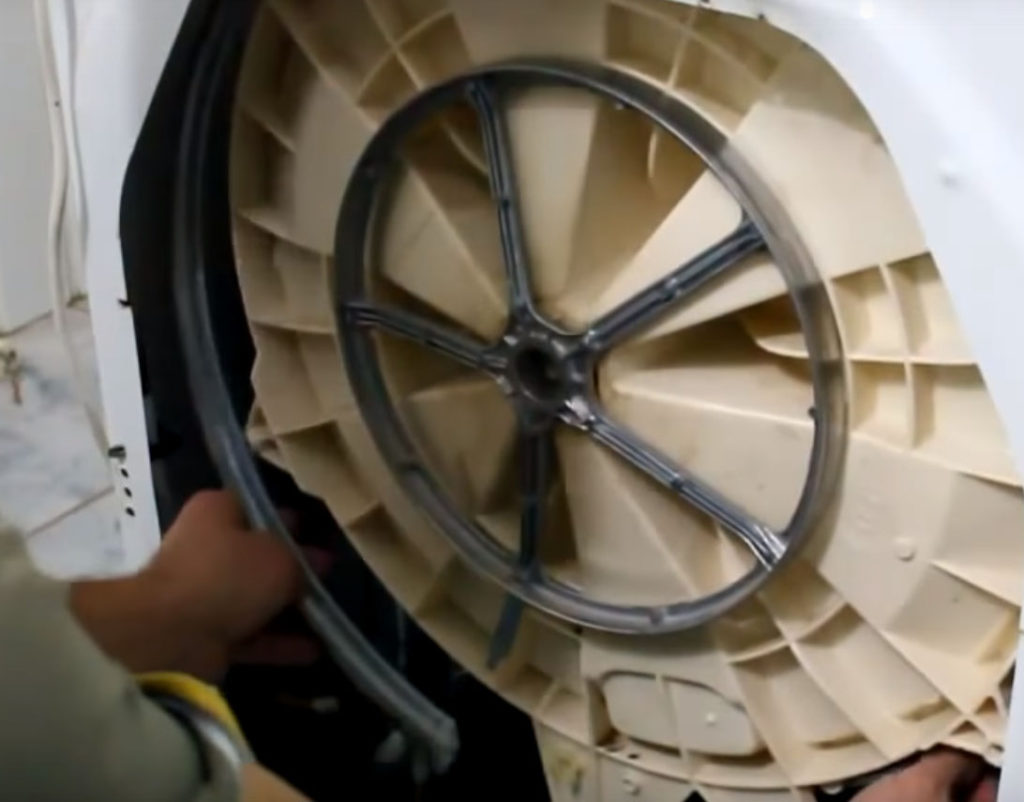
- During the next step of dismantling, special care and precision must be taken, as the drum pulley will need to be carefully removed. The complexity of this procedure lies in the fact that the pulley with the drum fits tightly to the axle.And if you try to rip it off using improvised tools, there is a high probability of causing damage. If the pulley is successfully removed, you can begin dismantling the spacer bar;
- The next step is to remove the fasteners from all counterweights and remove them;
- The fastening elements will also need to be removed from the movable drum assembly. It is possible that during the operation of the washing machine the screws were damaged by rust and became “stuck” to the metal, so it is recommended to treat them with WD-40 before unscrewing. You should not try to unscrew stubborn screws, as you may strip the threads.
Another important step is disassembling the drum and replacing faulty elements. All manipulations must be performed directly according to the instructions:
- the clamps holding the tank lid are removed;
- all seals and the lid on the tank are removed;
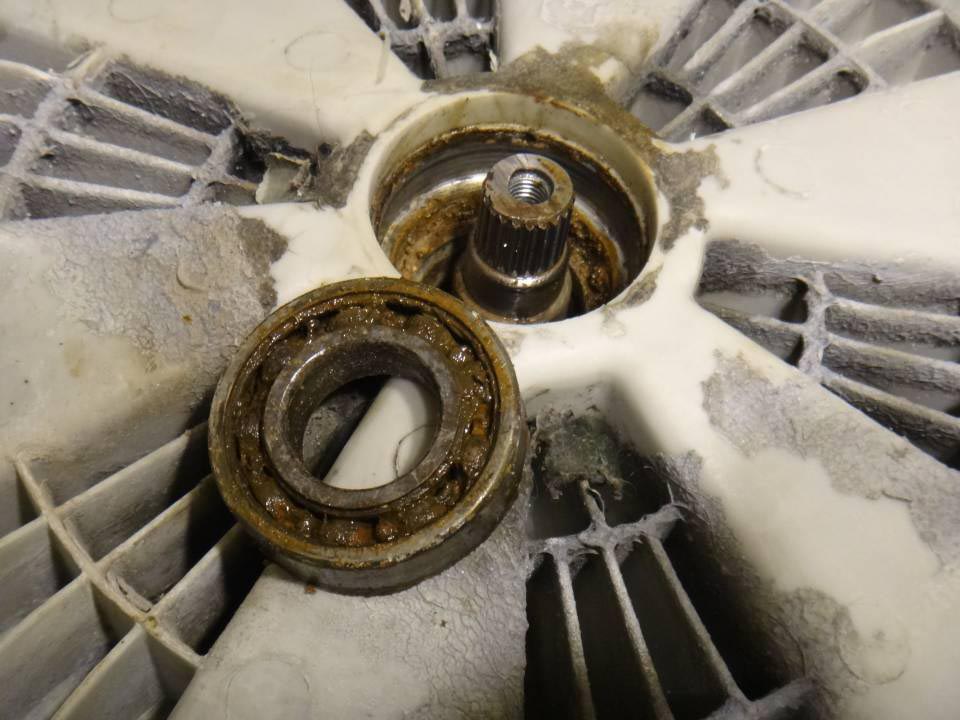
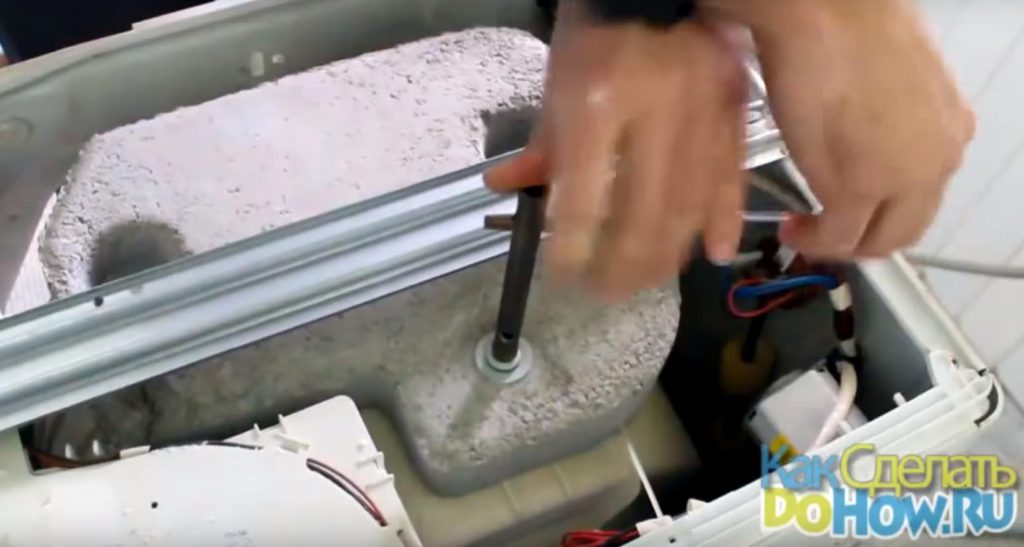
- the drum and the moving unit on which the bearings are located are removed;
- It is recommended to check the gasket under the moving unit and, if worn, replace it with a new one;
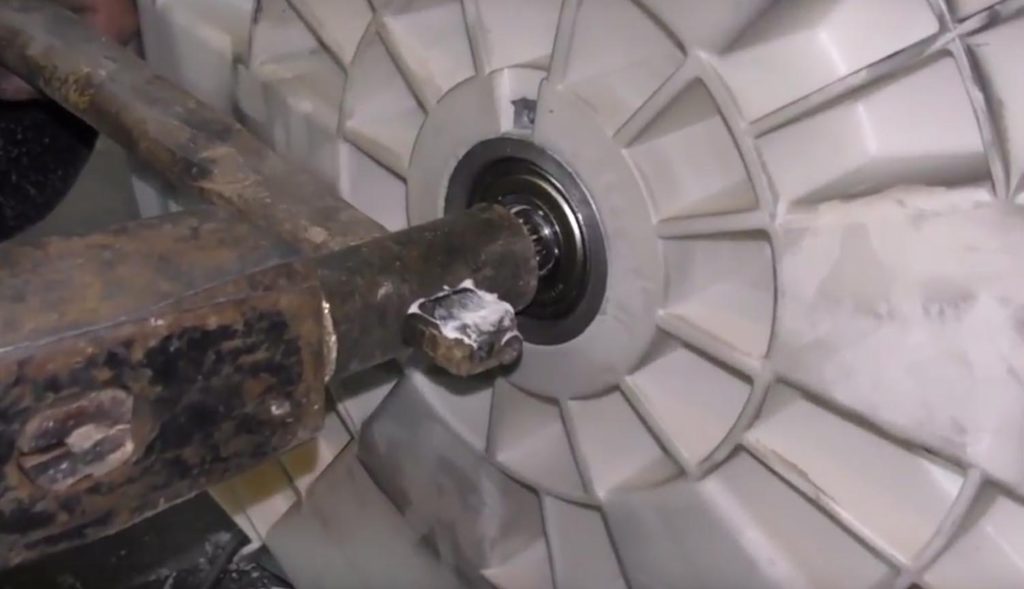
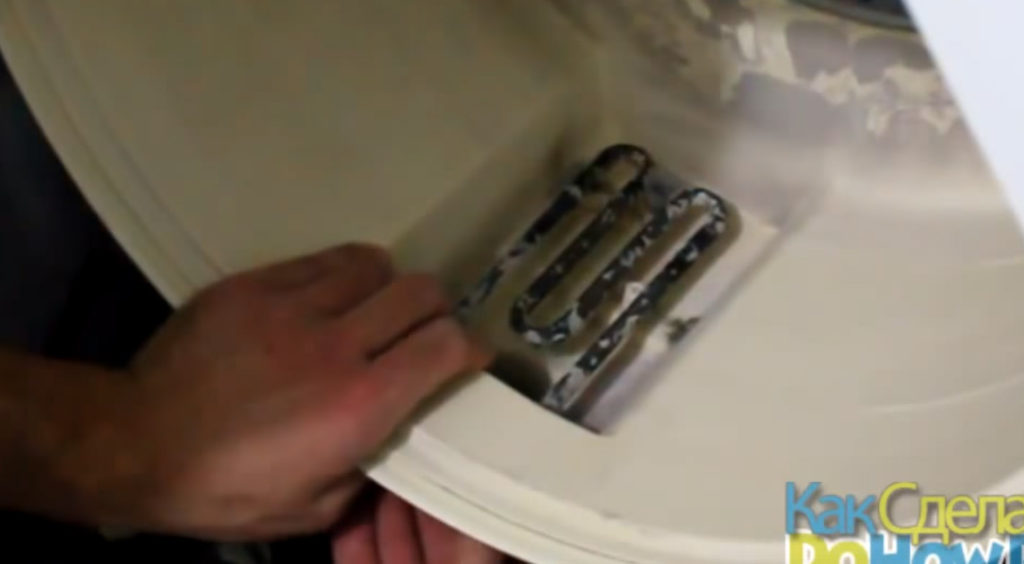
- the rubber cuff is treated with WD-40 and can be easily removed with a screwdriver;
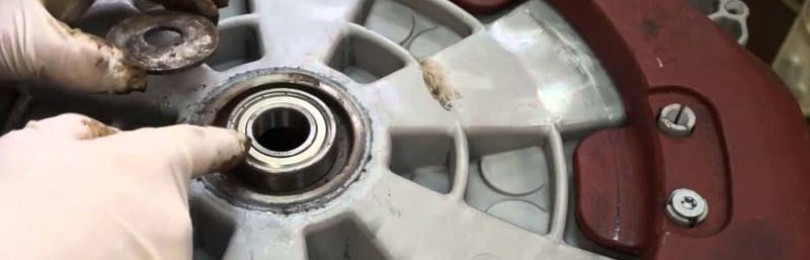
- After removing the cuff, you need to take a chisel and begin to carefully knock out all the bearings. You can also use a wrench;
- The knocked out bearing needs to be inspected and the markings found. With its help you can choose the right replacement.
Bearing replacement
Most often you can find two bearings in the assembly: on the outside there is a small one, and on the inside there is a large one. Both bearings must be removed as described above. It is also important that the larger one is usually the most worn. And it is so worn out that it is not possible to recognize the markings.But this is not a problem, because bearings are often marked sequentially and in the case when the small one is marked with the number 203, the large one is marked 204 and so on according to the same principle.
After removing the broken parts, the fitting of the purchased bearings begins. You will need several wooden blocks of the required size and a hammer. You can select the diameter of the blocks for the bearing by tracking how the hammer blow falls on its edges. By tapping the block, you need to seat the bearing.
lubrications Reverse assembly .
After installing new bearings in the unit, you can put the cover on the drum axle and proceed with the reverse assembly of the Indesit washing machine.
Installation also has its own sequence:
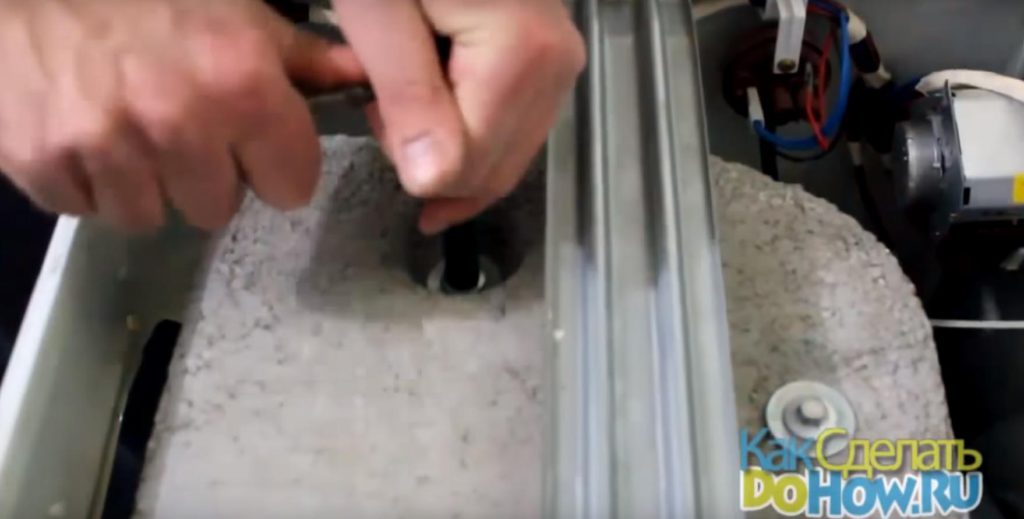
Before installing the drum in place, you must make sure that the heating element does not interfere with the movement of the rotating parts. After checking, you need to clean the edges of the tank so that the gasket fits tightly to it and does not break the seal;
- A pulley is installed on the drum, and this structure is placed in the tank;
- It is necessary to fix the tank with a rim and tighten it with a screw;
- After this, you can reinstall the engine, wires, install the counterweight and
- The engine and pulley are connected with a drive belt, which should fit exactly into the grooves;But this is not a problem, because bearings are often marked sequentially in the case where the small one is marked with the number 203, the large one is marked with 204 and so on according to the same principle.
- After removing the broken parts, the fitting of the purchased bearings begins. You will need several wooden blocks of the required size and a hammer. You can select the diameter of the bearing pads by observing how the hammer hits its edges. By tapping the block you need to seat the bearing.
- It is recommended to pay special attention to the moment of seating the cuff, since it must not be deformed and not fit tightly into the socket. For a more accurate fit, you can apply a wooden block to the cuff and tap it until it is completely and evenly in place.
To improve the sliding of the bearing, you can use dishwashing detergent, which is applied in a thin layer to the cuff, but do not clog the bearing with other


