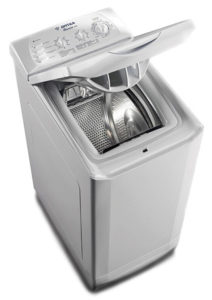
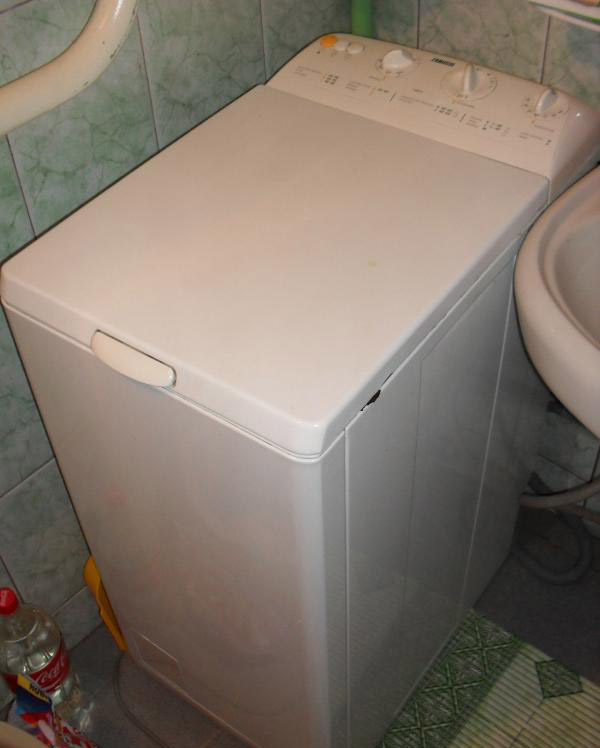
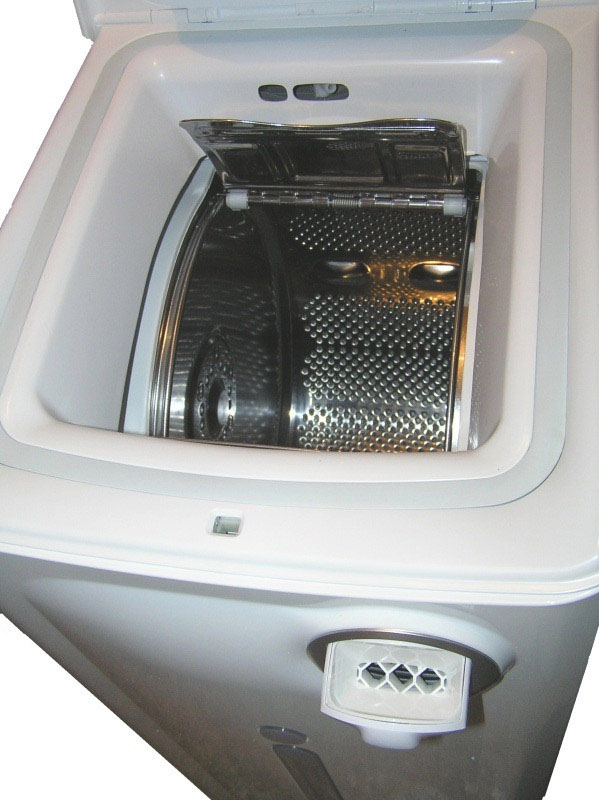
 It is no secret that in many apartments the bathroom is small and there is practically no space to install a washing machine. In this case, a top-loading washing machine is perfect. It takes up little space and can be installed in even small rooms.
However, vertical machines, like all machines, can break down over time. And some malfunctions are unique to washing machines of this type. How to repair a vertical washing machine with your own hands will be discussed later in the article.
Malfunctions of a vertical washing machine
Many malfunctions of vertical machines are also relevant for front ones. However, top loading machines There are also faults that are unique to them.
These breakdowns are associated with the design features of the machine and the location of the components. And the main feature of the repair is access to the internal elements of the vertical washing machine by dismantling the side panels.
Leaks that can be eliminated without disassembling the housing
All of the following types of leaks can be eliminated without disassembling the machine body:
- The drain filter is leaking.In this case, you need to check the condition of the seal and also check the tightness of the filter. If the drain filter is dry, then move on to the top cover.
- Deformation/wear of the upper door seal. If a puddle appears under the machine, then first of all we check and repair this particular rubber seal. When you remove the control panel of the machine, you can notice a coating of rust on the body.
A leak like this can cause serious problems, such as repairs or replacement of expensive parts. Therefore, we fix the leak as quickly as possible.
In this case, you don’t have to change the entire seal, but just put rubber in the area of the leak. As a result, the seal will rise slightly and, therefore, the tightness will be restored.
The next step of the test is to remove the side panels. To do this, unscrew the screws located on the rear wall. Next, you need to pull the bottom edge a little, and then move it down and back. Once the side panels are removed, the front can be removed. After all, there will be access to the screws with which the front wall is secured. As a result, access to the internal components of the machine will be gained. Next, we look for leaks inside the washer.
- Checking the water tube connection on the fill valve. If the connection is not reliable, then we carry out the repair ourselves - we dismantle the tube, lubricate it with silicone, and then we need to put it in its original place and tighten the clamp. Next, we check the integrity of the entire rubber tube.
- We inspect the rubber pipe connected to the washing machine tank. If there are traces of leaks, then we carry out repairs - dismantle the pipe, seal it with silicone, and then install it in its old place.
- Check the reliability of the drain hose and drain pipe. If there are traces of leaks, then we perform similar repair actions.
- You should also check the condition of the rubber cuff located at the top. We check the fastening of the clamp holding it in place.
- Check the tank for leaks. The screws that connect the tank may have become loose over time. In this case, we tighten them, but not too much so as not to curl them. A small hole may also appear in the tank body of the machine. It should be soldered carefully.
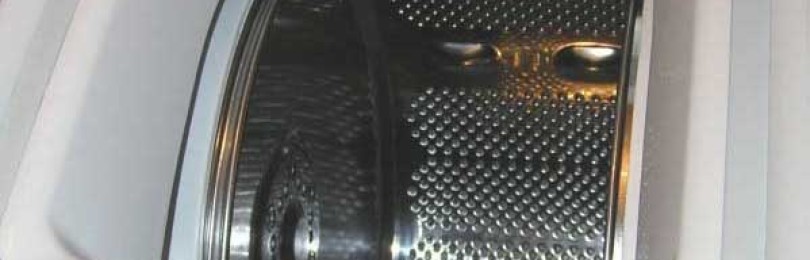
- Water may also be leaking from the drum bearing seal.. In this case, we will most likely replace the bearing as well.
Why do the loading hatch flaps open spontaneously during operation?
This may occur due to an imbalance in the drum of the machine. Such a machine malfunction can lead to serious consequences.
The opened flaps will come into contact with the heating element, and this will lead to breakdown of the latter. The drum will become blocked and may be damaged. If the tank and drum are damaged, they may require complete replacement.
But this, of course, is an extreme case. If only the heating element fails, it can be easily replaced with a new one. The process of replacing this element is carried out in the same way as for front-facing machines.
Bearings may also become unusable. Changing bearings in top-loading machines is a little different from the same process in front-loading washing machines.Replacing bearings for washing machines of this type will cost from 3,000 rubles, these are the prices offered by the service center
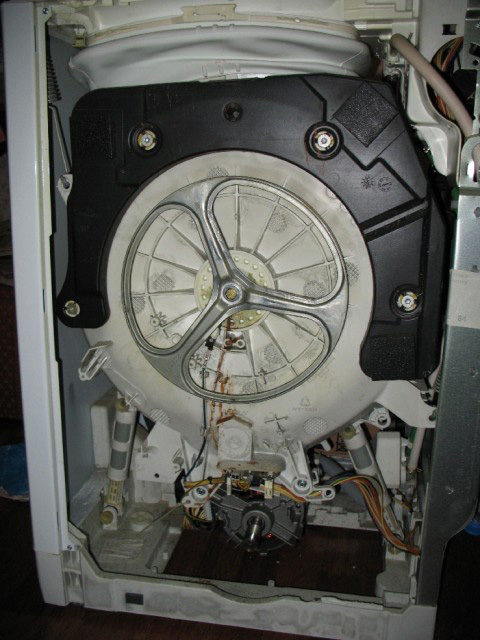
Replacing bearings in a vertical washing machine
Holds on drum top loading machines on two axle shafts with bearings. These bearings are located on the outside of the washer tank. When replacing them, first of all disconnect all the wires. Then we dismantle the linings located on the sides of the machine drum. Under these pads there are calipers with bearings.
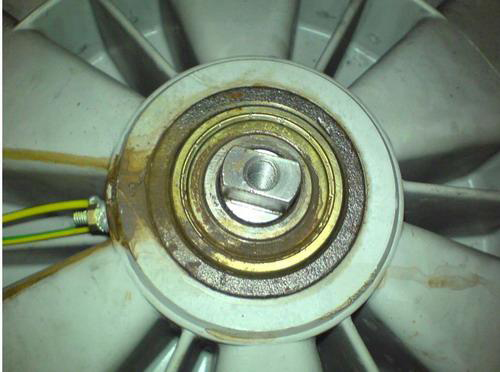
First of all, we replace the bearing located on the side where the pulley is missing. Next, remove the caliper. The thread on this side should be right-handed, so unscrew it counterclockwise. After dismantling this element, we replace the oil seal and bearing.
On the reverse side, you must first remove the drive belt. When the belt is removed, remove the pulley, as well as the grounding block.
On the reverse side of the caliper there is a left-hand thread. This means that you need to unscrew it clockwise. We clean the installation sites of new bearings and then lubricate them. Next, the calipers are installed and assembly is performed.
In some cases, it may be necessary to disassemble the machine tank. Then we unscrew the screws that secure its cover, and then carefully separate it at the soldering points. Reassembling the tank is done in the same way as for front-loading machines.
Other maintenance and repair work top loading machines are performed in almost the same way as for front-facing washing machines.


